How I made a LEGO lenticular mosaic of Mario & Luigi (in 2017!)
Waaaay back in 2017, I designed and created a lenticular LEGO mosaic (2 images in 1) of Mario & Luigi, and it’s the only original build I’ve kept! Luckily I still have my notes from the time, so I’m writing them up in case anyone else wants to make something similar.
As a warning, these can be surprisingly expensive (it is LEGO after all). Mine cost around £30, plus £10 shipping, and £5 for the baseplate. There’s more pixels than you think!
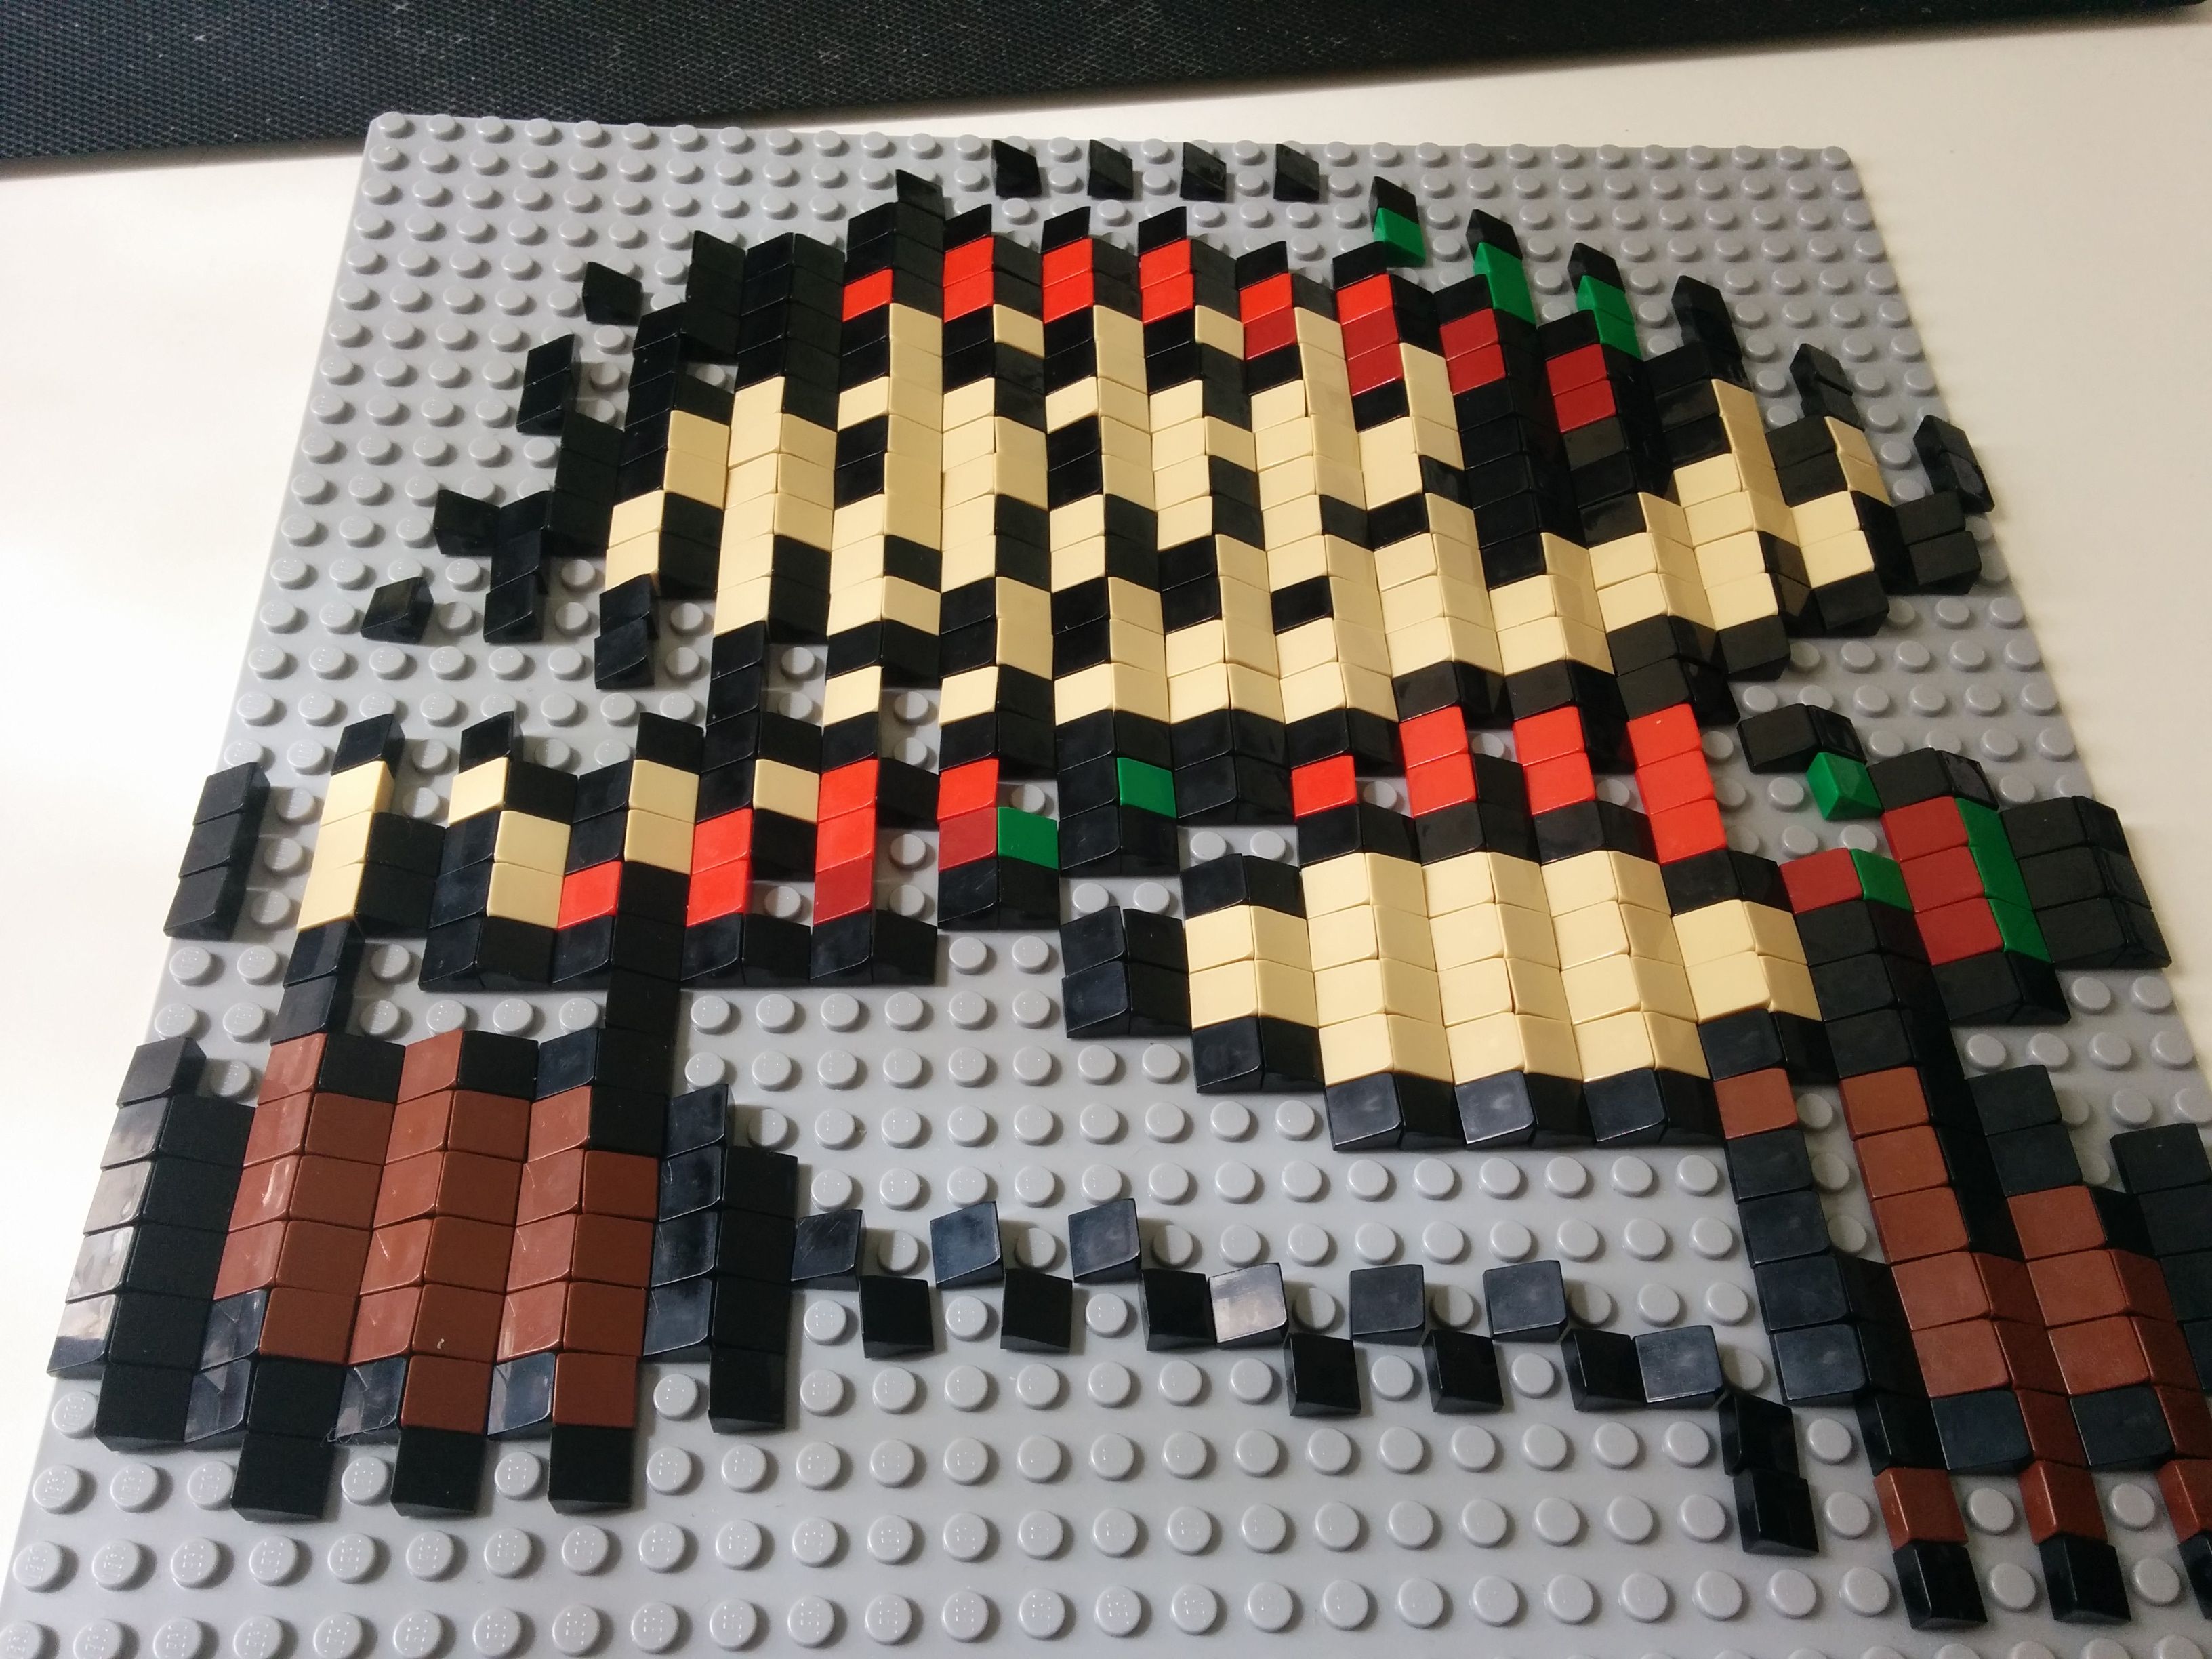
So, what is a lenticular mosaic? Well, it’s this:
By laying out alternating rows of ramp bricks, 2 images can be seen depending on the viewing angle. There’s existing guides, but most assume you know what you’re doing in terms of ordering LEGO pieces etc! This post is a complete beginner’s guide, since that’s what I still am.
1: Picking your design
First, you need to decide what 2 pixel art images to use. These can be anything at all, but of course every pixel will mean a brick, so keep the overall size and cost in mind!
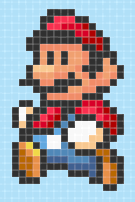
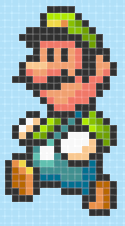
I chose Mario and Luigi sprites from one of my favourite games of all time, Super Mario Advance 4. Make sure you have the original sprites, and not compressed images, or you may miscount the pixels later on.
| Spritesheet | Mario | Luigi |
|---|---|---|
 |
 |
2: Create your LEGO colour palette
Now you’ve got some pixel art, you need to convert it into LEGO colours. This will usually require simplifying the design a bit, e.g. I converted the 4-5 reds in Mario’s top into 2 different colours. Here’s how to create your palette:
- Identify all the different colours in your pixel art images. This is easiest with the colour picker in Photoshop or Paint.
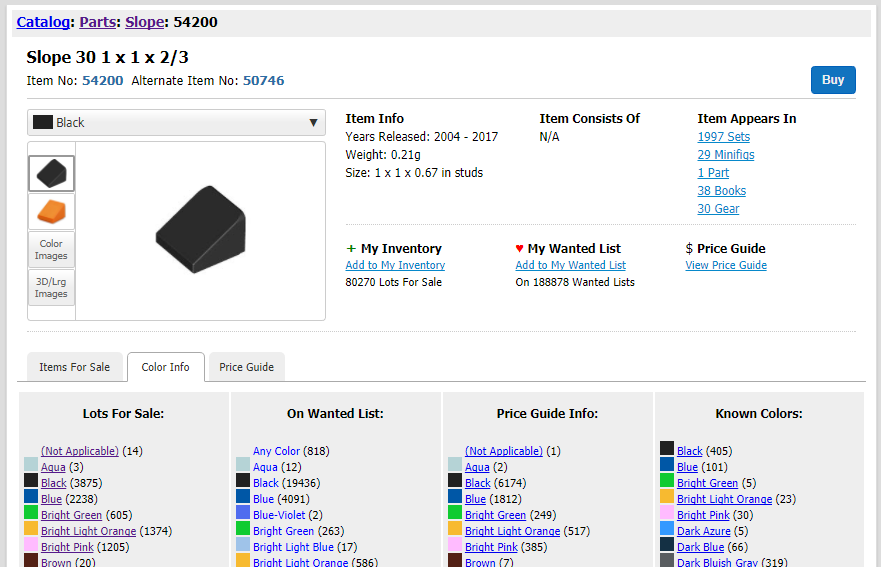
- Look at the list of colours the 1x1 slope comes in, and make a note of which are most similar to your colours.
- Whilst doing this, keep in mind the number of bricks available for each colour. For example, in this image “Brown” might be the ideal colour, but there’s only 14 for sale! “Dark Brown” has 2494 for sale however, so is a far better choice.
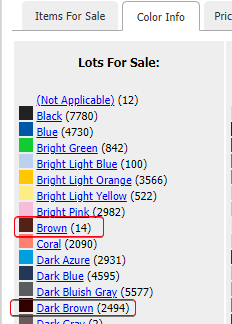
At the end of this process, you should have a list of LEGO colours you want to use. Now to work out how many of each brick you need!
3: Preparing your blueprint
This step is technically optional, but I found it massively helped when putting all the bricks in place. We need to interlace our 2 images together, column by column, so we know what our final board will look like:

There’s probably a better way to interlace 2 images, but here’s how I did it:
- Add both images into the same Photoshop file as individual layers.
- Resize both layers to be twice as wide, thus cloning each pixel.
- On the layer in front, erase every other column, revealing the layer below.
- After this, you’ll be seeing alternating columns of the two images, perfect!
4: Getting your brick list
Either by hand, or in Photoshop, count the number of pixels of each colour. In Photoshop, this can be done by:
- Opening the histogram window.
- Use the magic wand (with “Contiguous” and “Anti alias” off)
- The number of pixels required will be listed under “Pixels”. There’ll be more than you expect!
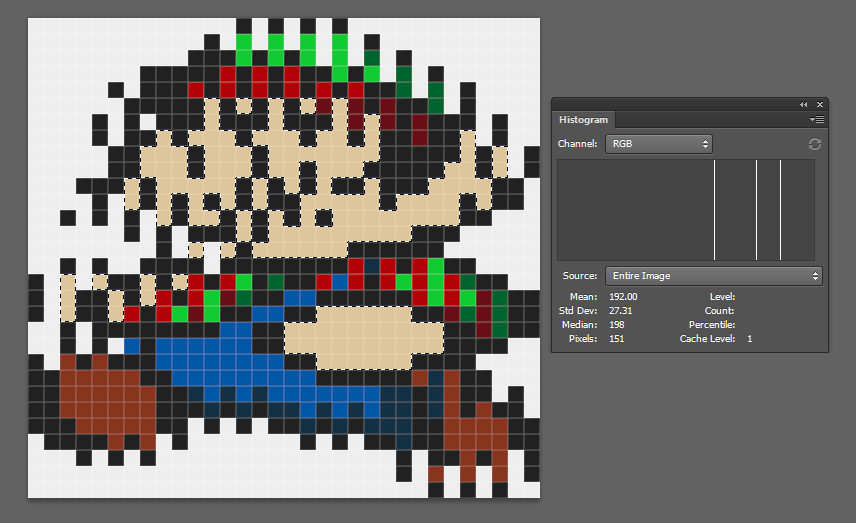
For my design, I needed (in addition to a 32x32 baseplate):
- White: 317
- Black: 313
- Bright green: 19
- Green: 12
- Red: 25
- Tan: 151
- Dark red: 13
- Dark blue: 23
- Blue: 43
- Reddish brown: 44
5: Buying your bricks
You should now have a list of LEGO slope colours, and how many of each you need. The final step is actually buying them!
Bricklink is great for this, and is essentially eBay for LEGO. This was my first time using it, so here’s a few tips I wish I’d known:
- Order a few extra (~10%)! Bricks are around 1p / 1c, so it’s worth it.
- Order from the same seller when possible, to save on shipping.
6: Putting it all together
Debatably the easiest step, just follow your blueprint from step 3! I found it easiest to go colour by colour, be careful when counting your pixels though.
Hopefully this post helped and you’ve now got an interesting lenticular mosaic!
One more time, here’s my finished result:
Bonus: Pictures from my build
| Stage | Picture | Description |
|---|---|---|
| Outline |  |
First, I did Mario’s outline. I used a bright green background in photoshop so that the pixels stood out easier. |
| Mario skin | 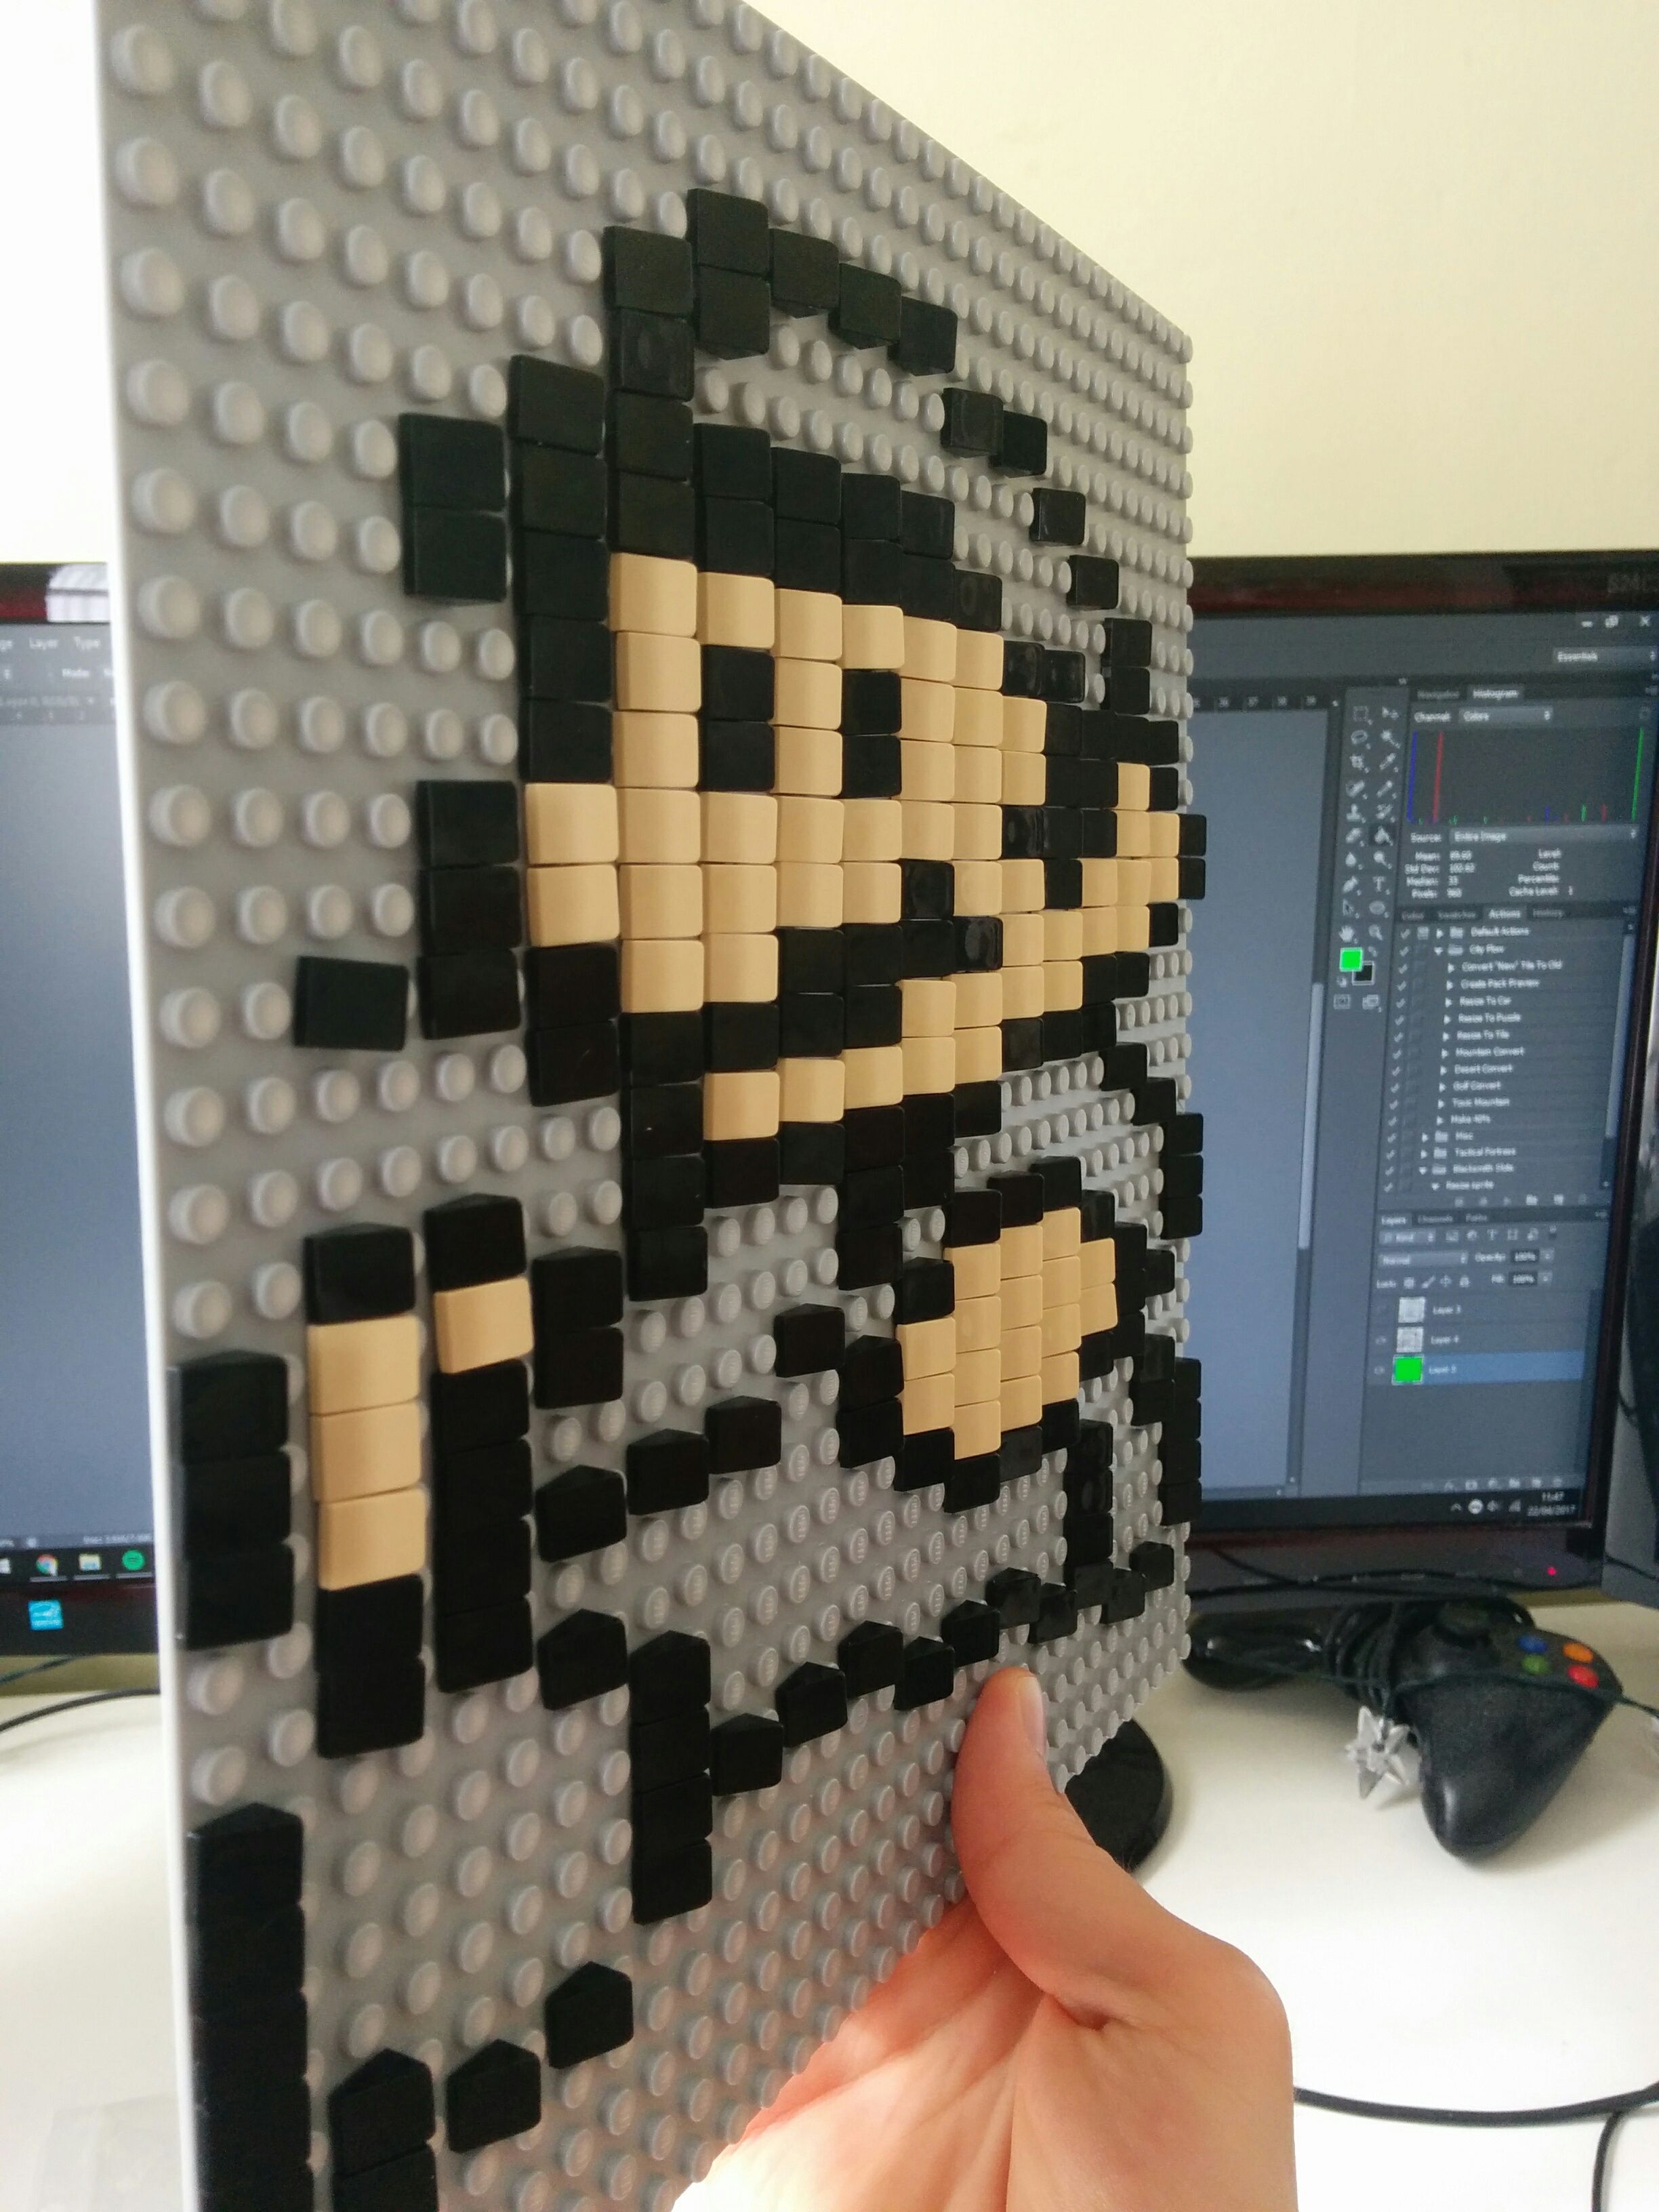 |
Next, he gained skin! |
| Mario clothes |  |
He then gained boots, a top, and a hat. |
| Luigi skin + clothes | 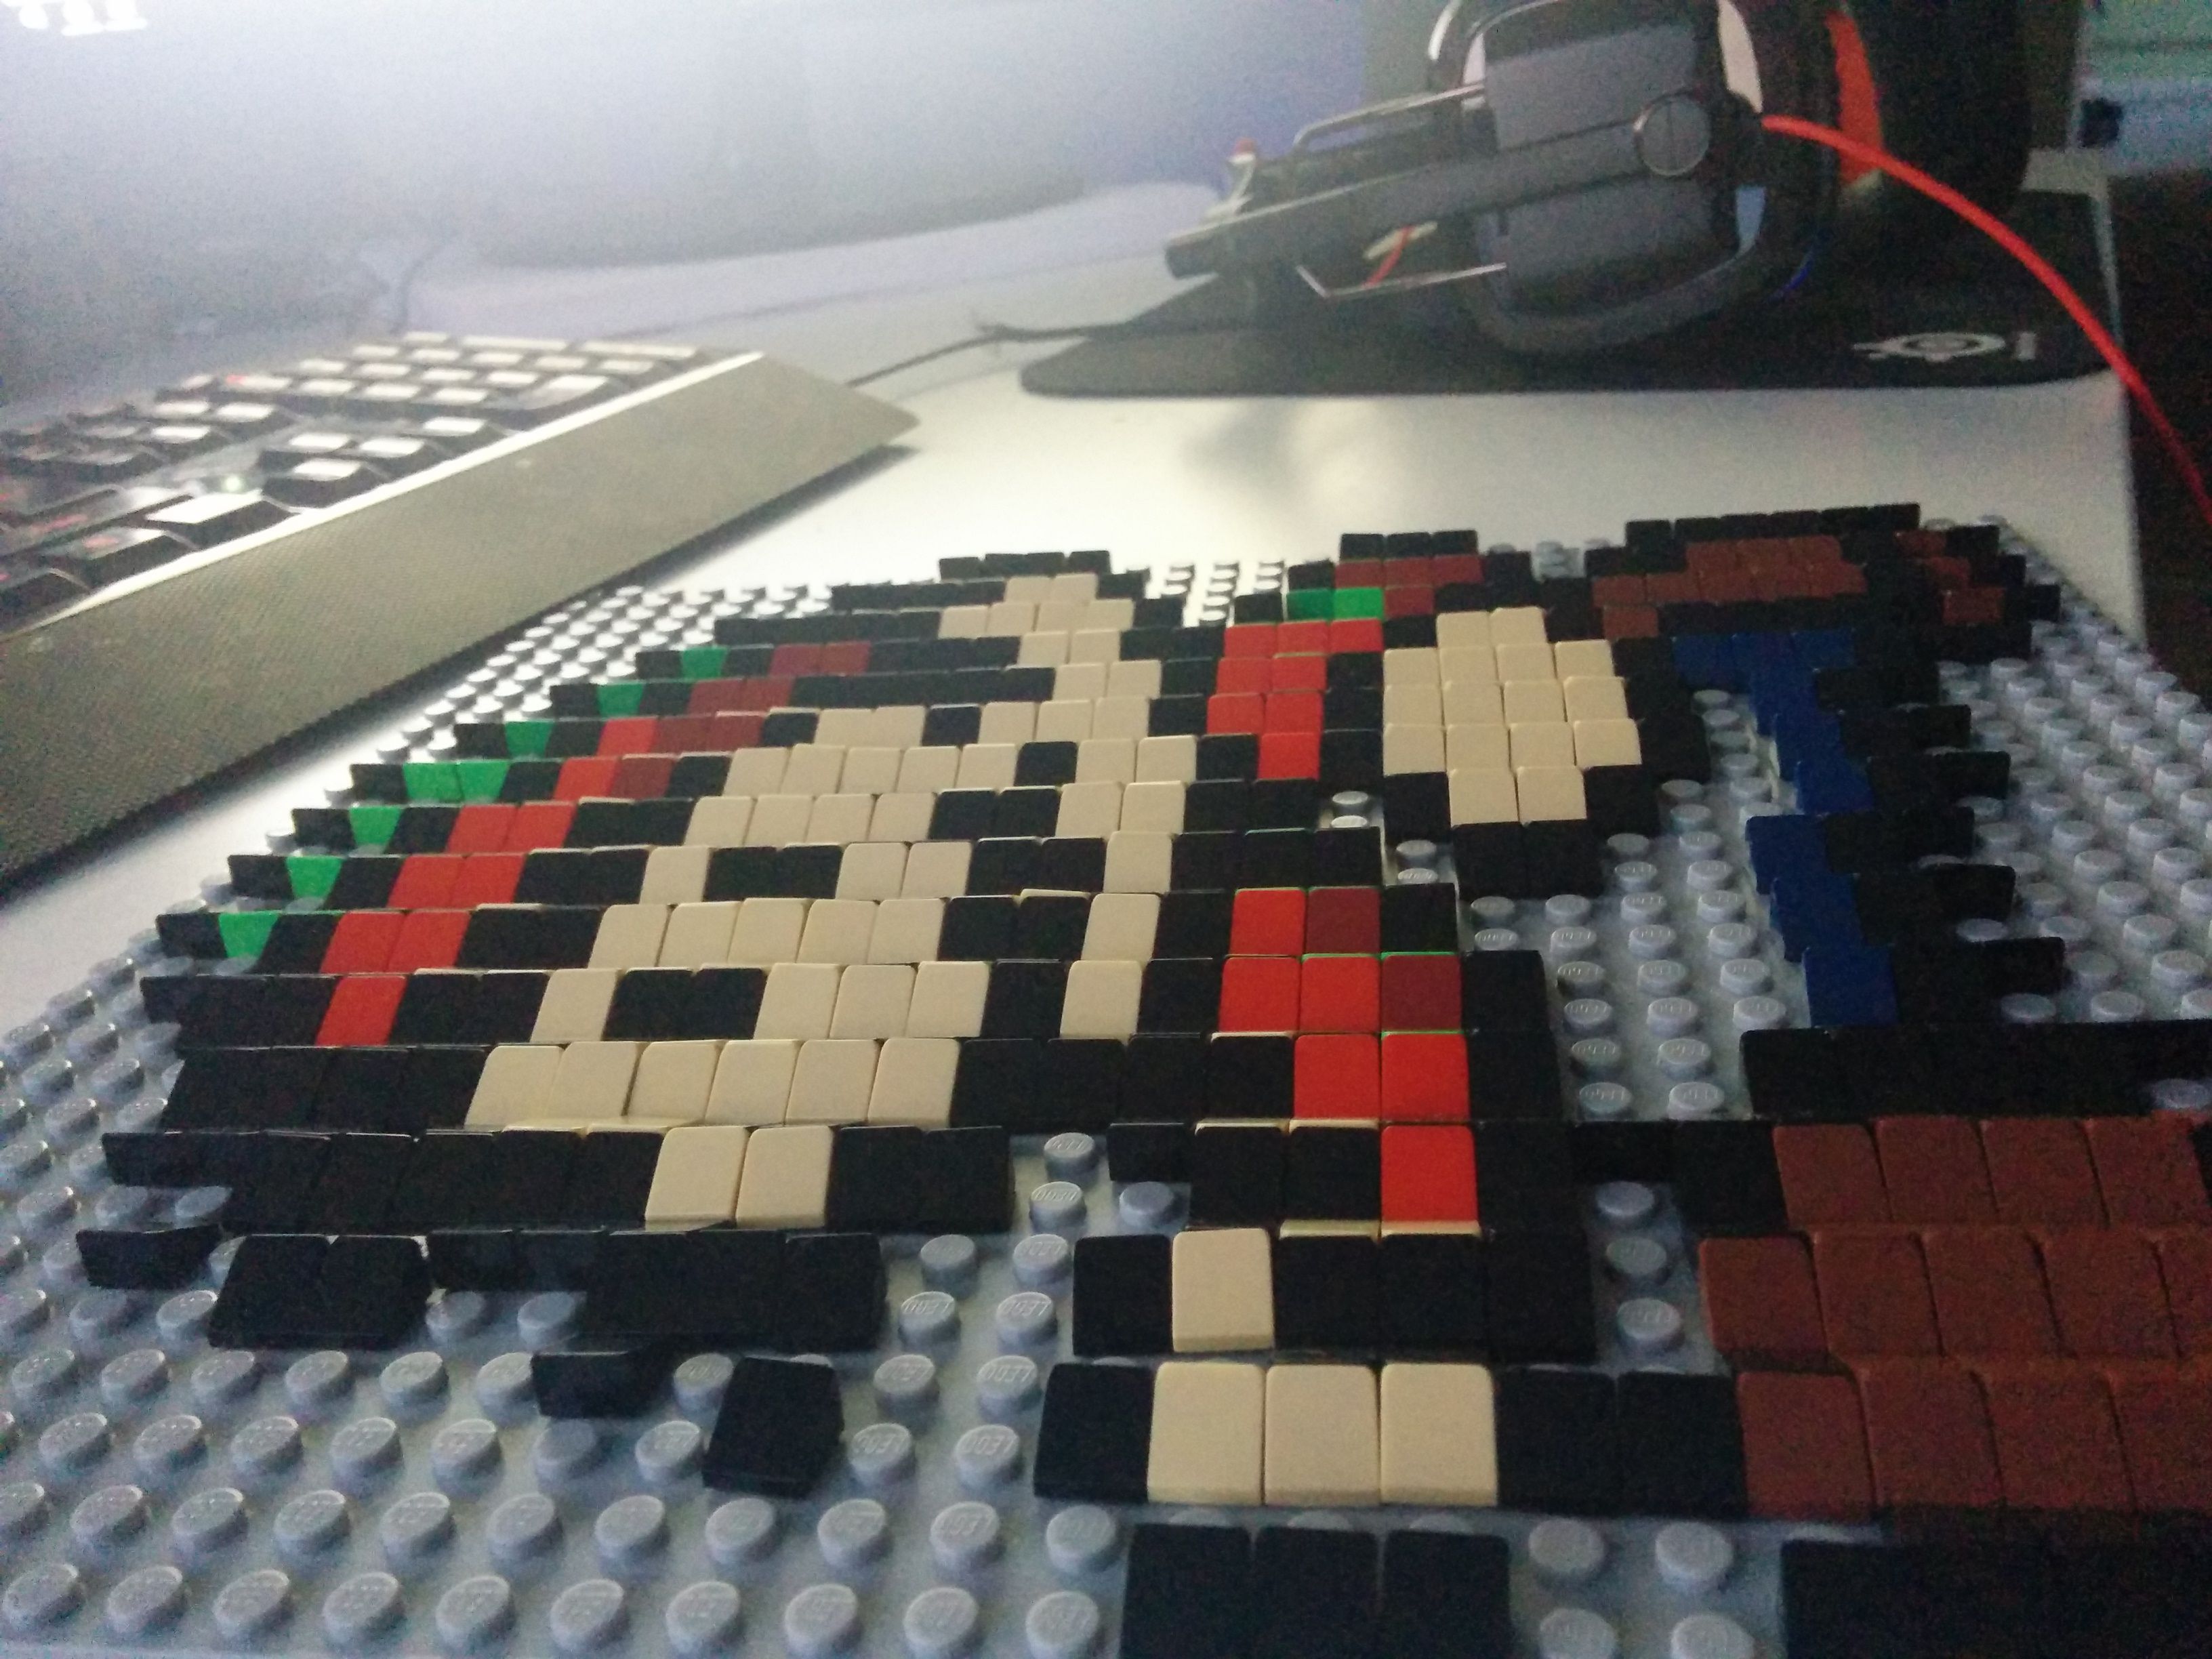 |
Luigi then got involved, note that it looks messy here because lots of bricks are missing, so the images are merging together. |
| Luigi skin + clothes 2 | |
Luigi’s outline, skin, shoes, and dark green bits are done. All that’s left to do is their dungarees, and Luigi’s light green sections. |
| Mario finished | 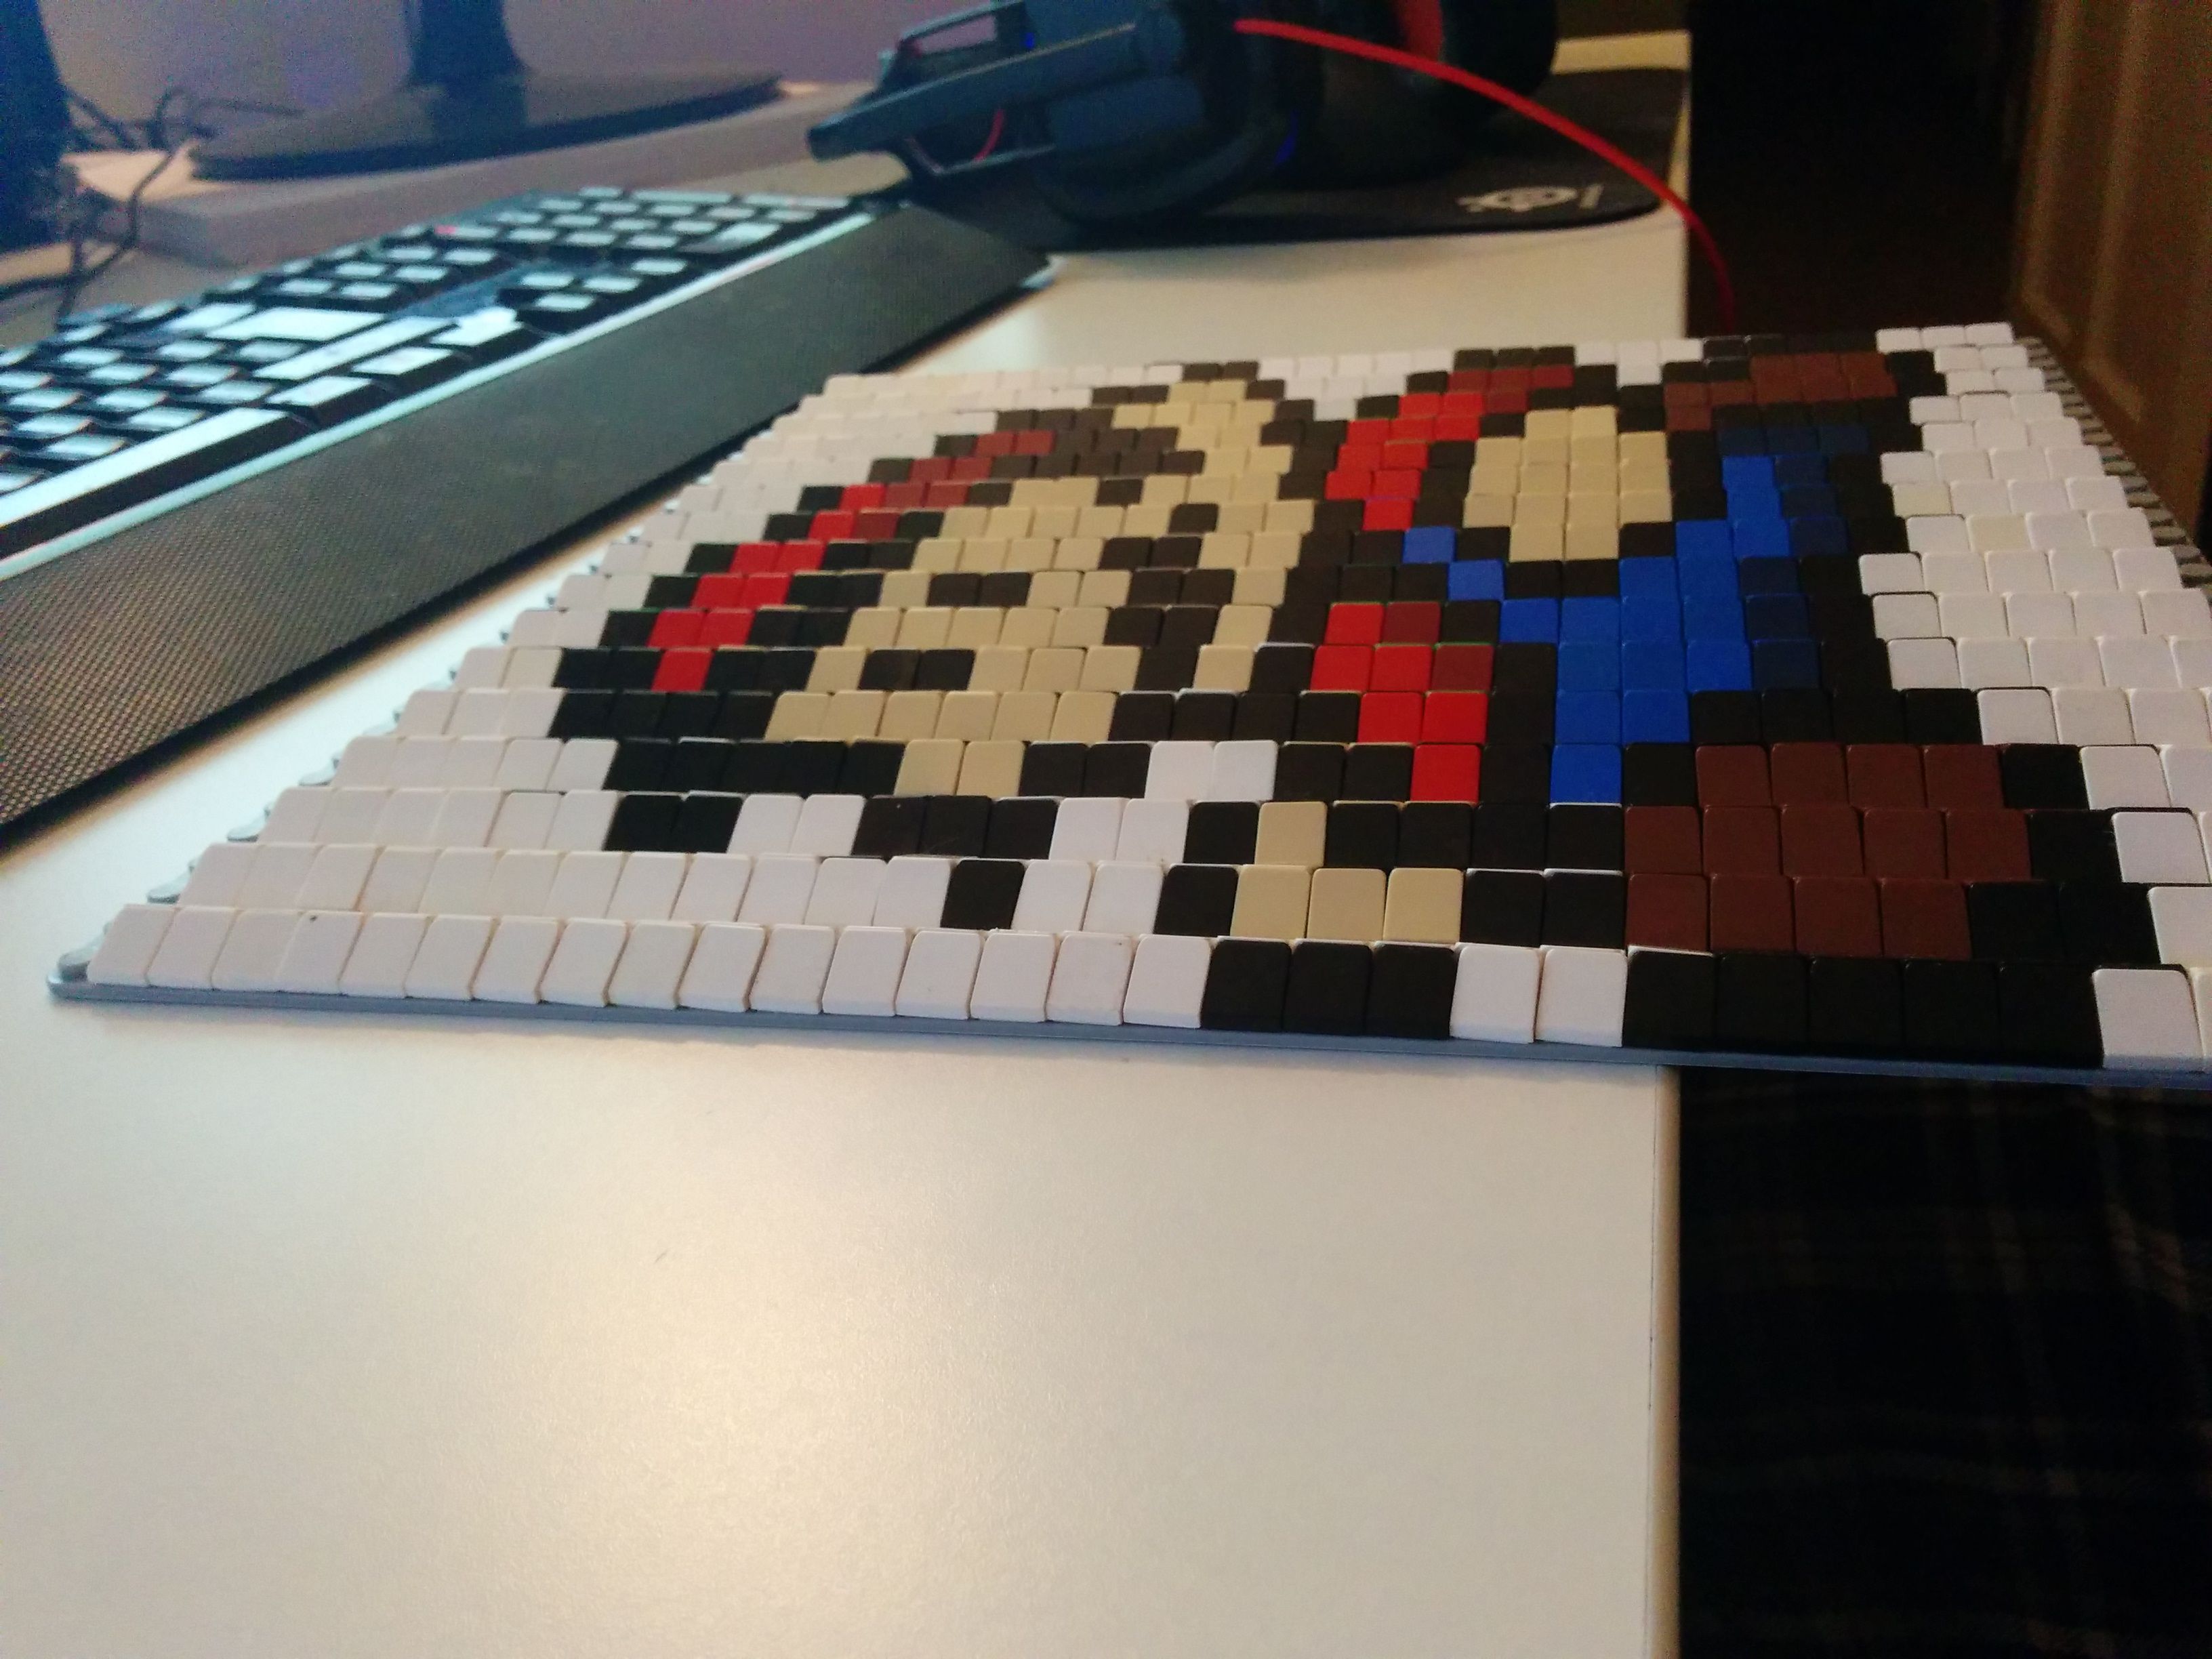 |
All done! Mario looks very Mario-y… |
| Luigi finished |  |
… and Luigi looks very Luigi-y! |