How to replace a faulty Flexispot standing desk leg motor
I purchased a Flexispot E7 recently, and had a great experience with it. I then purchased an additional one for my partner and encountered an issue. After contacting support, replacement motors were sent, but with no instructions on how to fit them! Here’s the missing guide on how to replace Flexispot leg motors.
Note that there is a semi-official guide posted by a support rep, but the images are tiny and extremely low quality.
Click any of the images in this post to see them in full quality.
Step 1: Preparing the leg
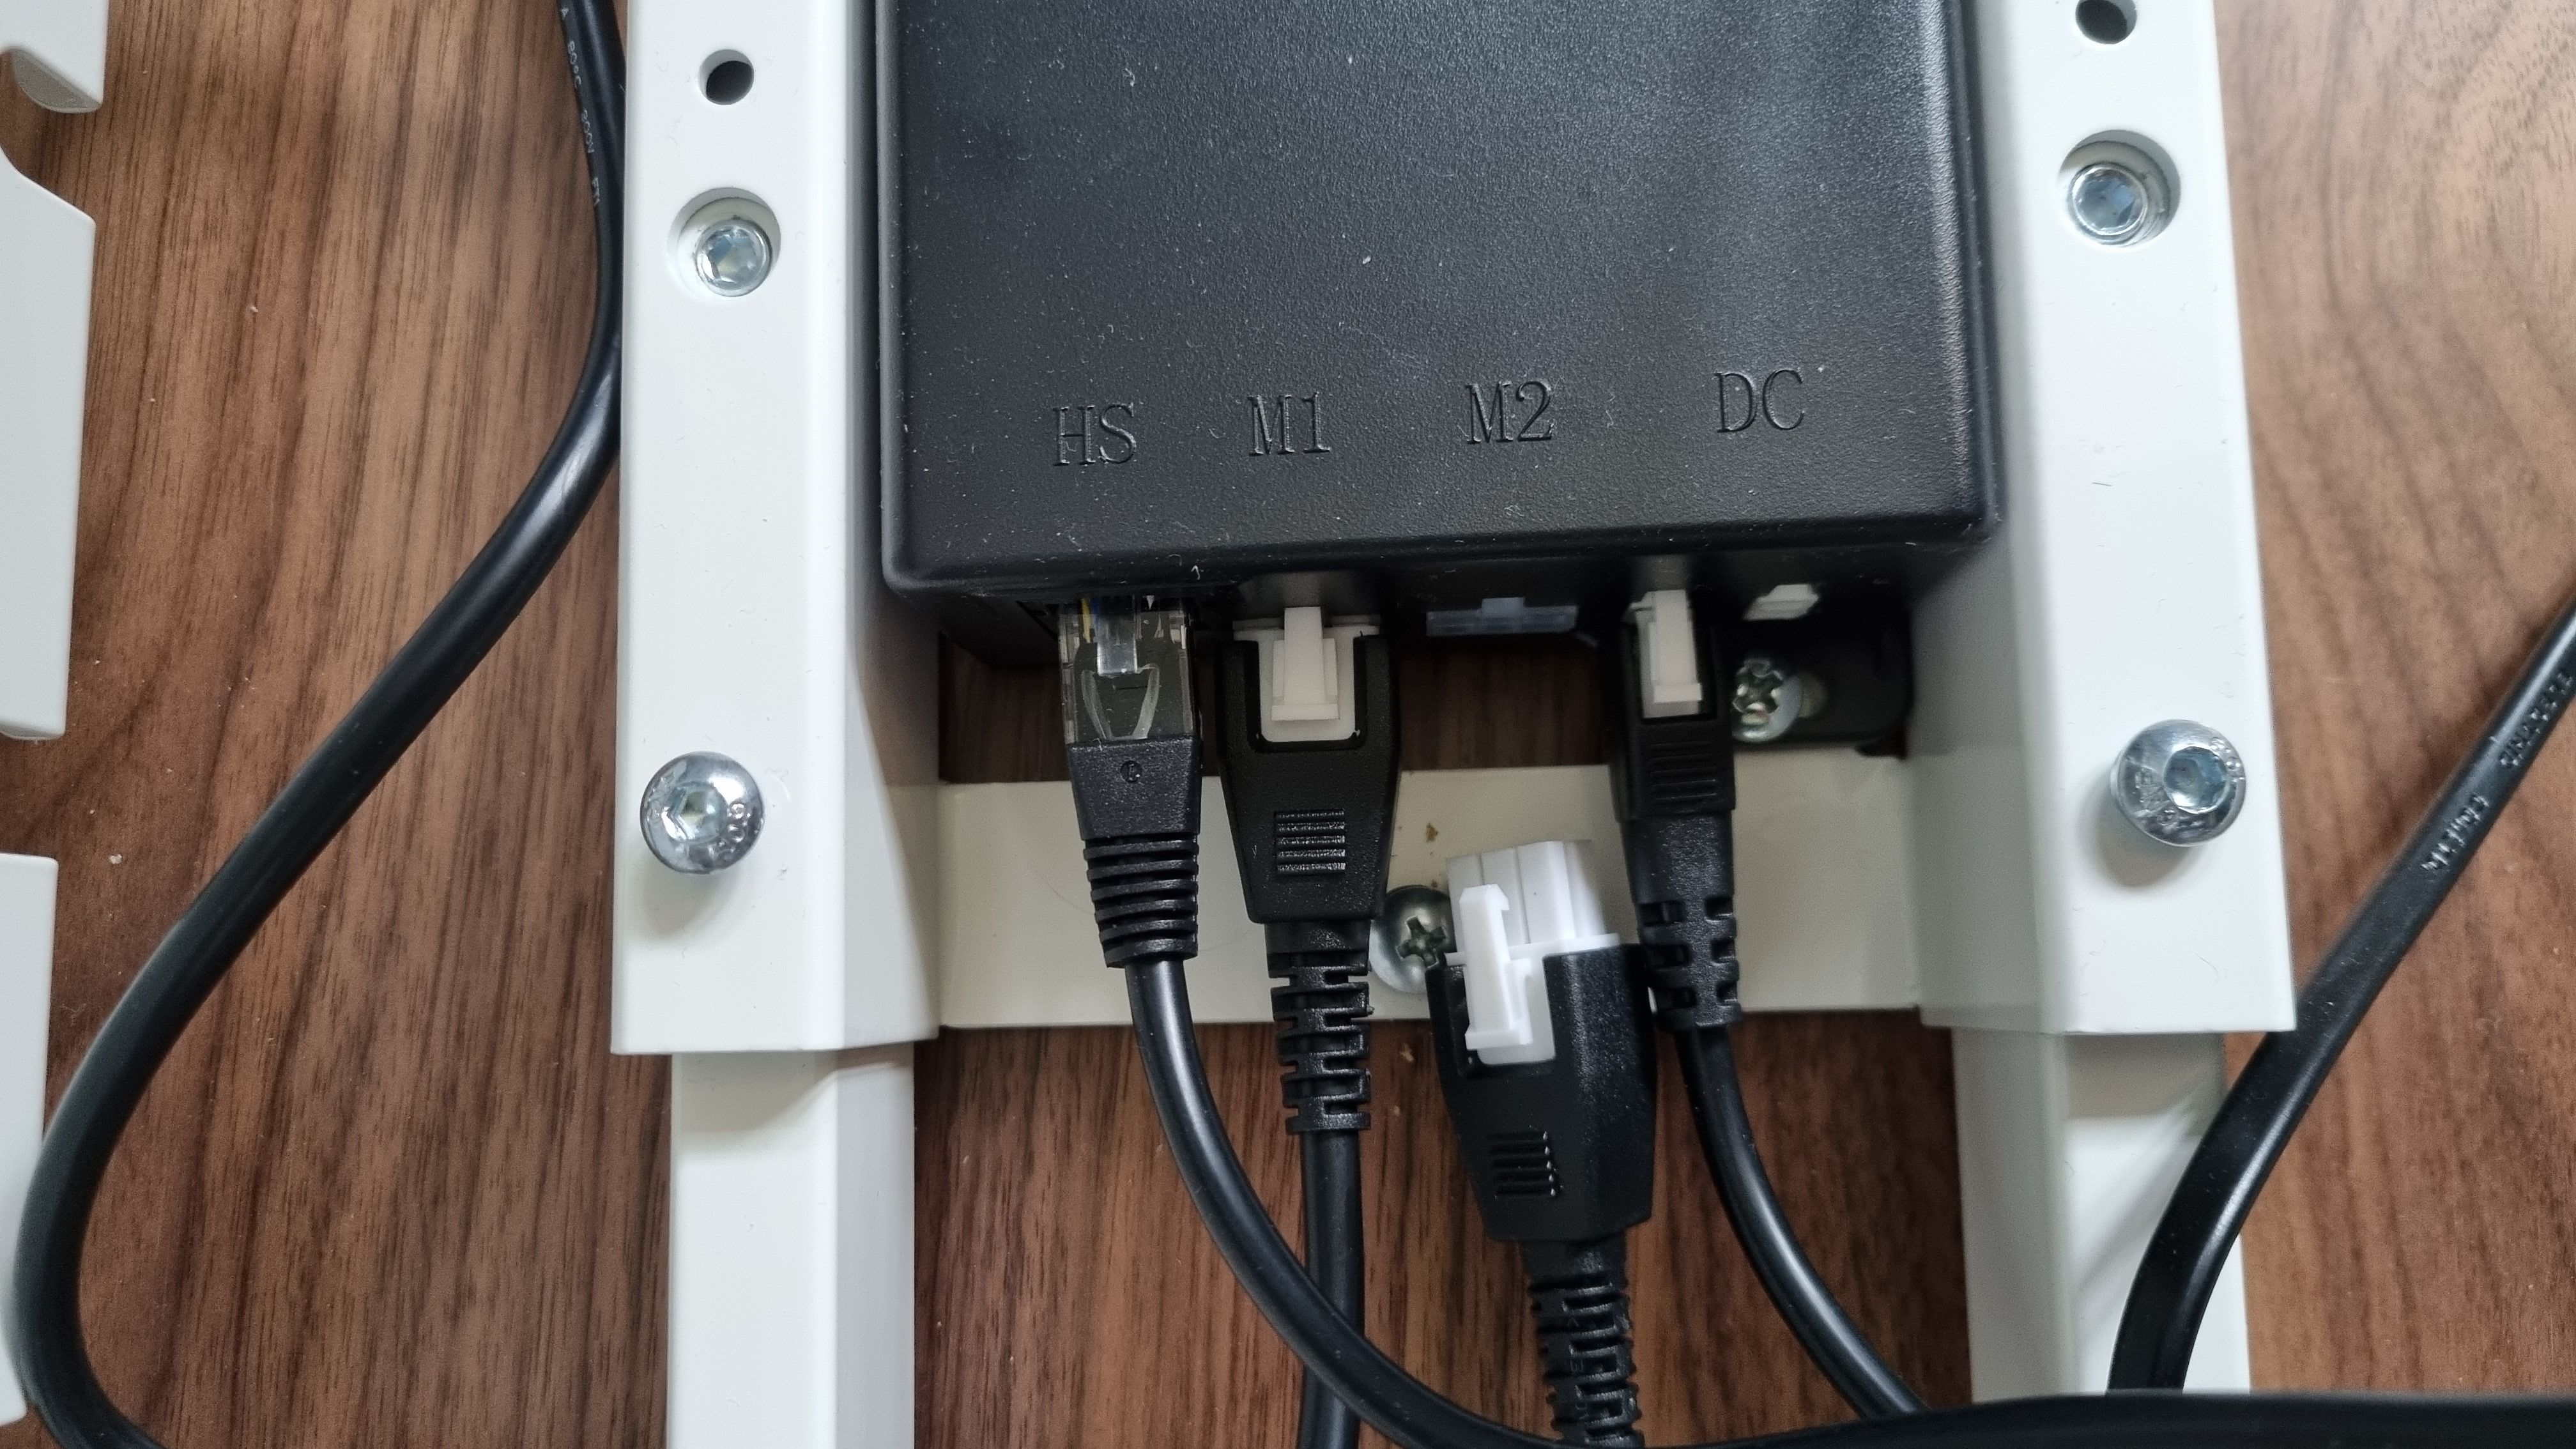
First, flip your desk upside down, and unplug the leg you’re going to be working on (M1 / M2).
Step 2: Unscrewing the leg
Unscrew the 4 connecting screws, using either the Flexispot tool or your own screwdriver.
Step 3: Flipping the leg
Flip the leg again, it will need supporting whilst you work on it.
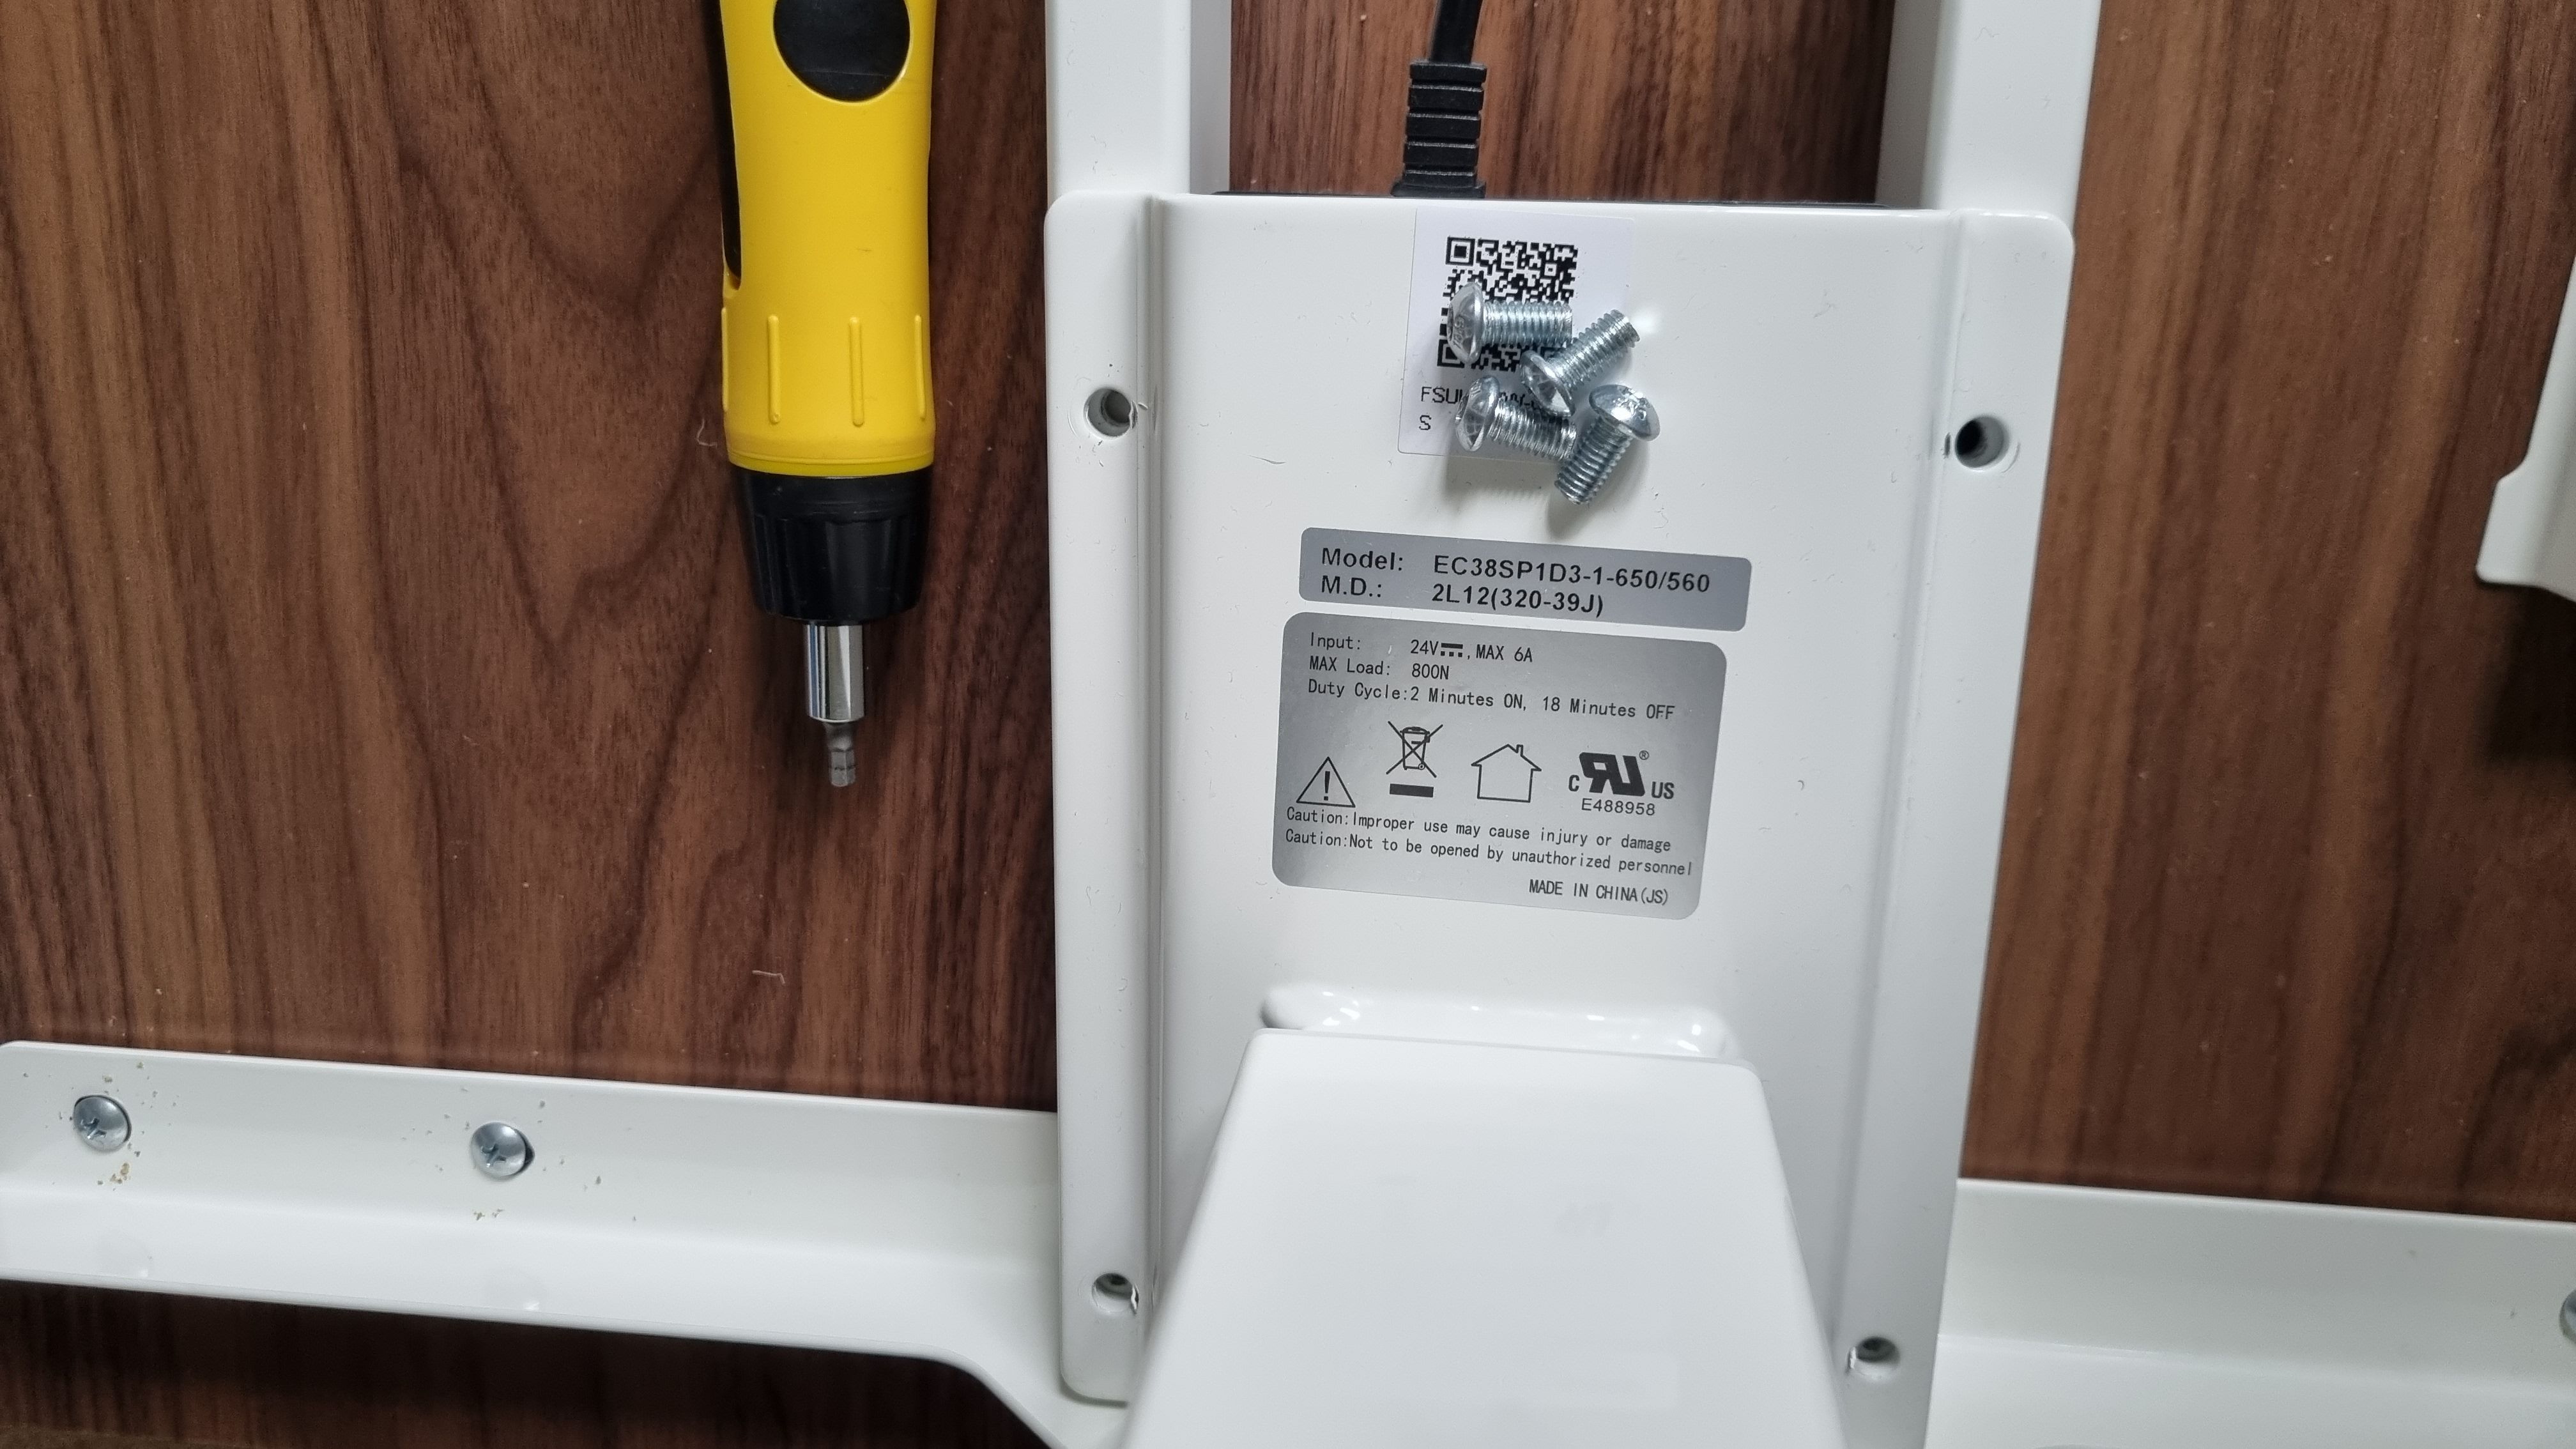
Step 4: Removing the case
Unscrew the 4 long screws holding the black case in place, again using the Flexispot tool or your own.
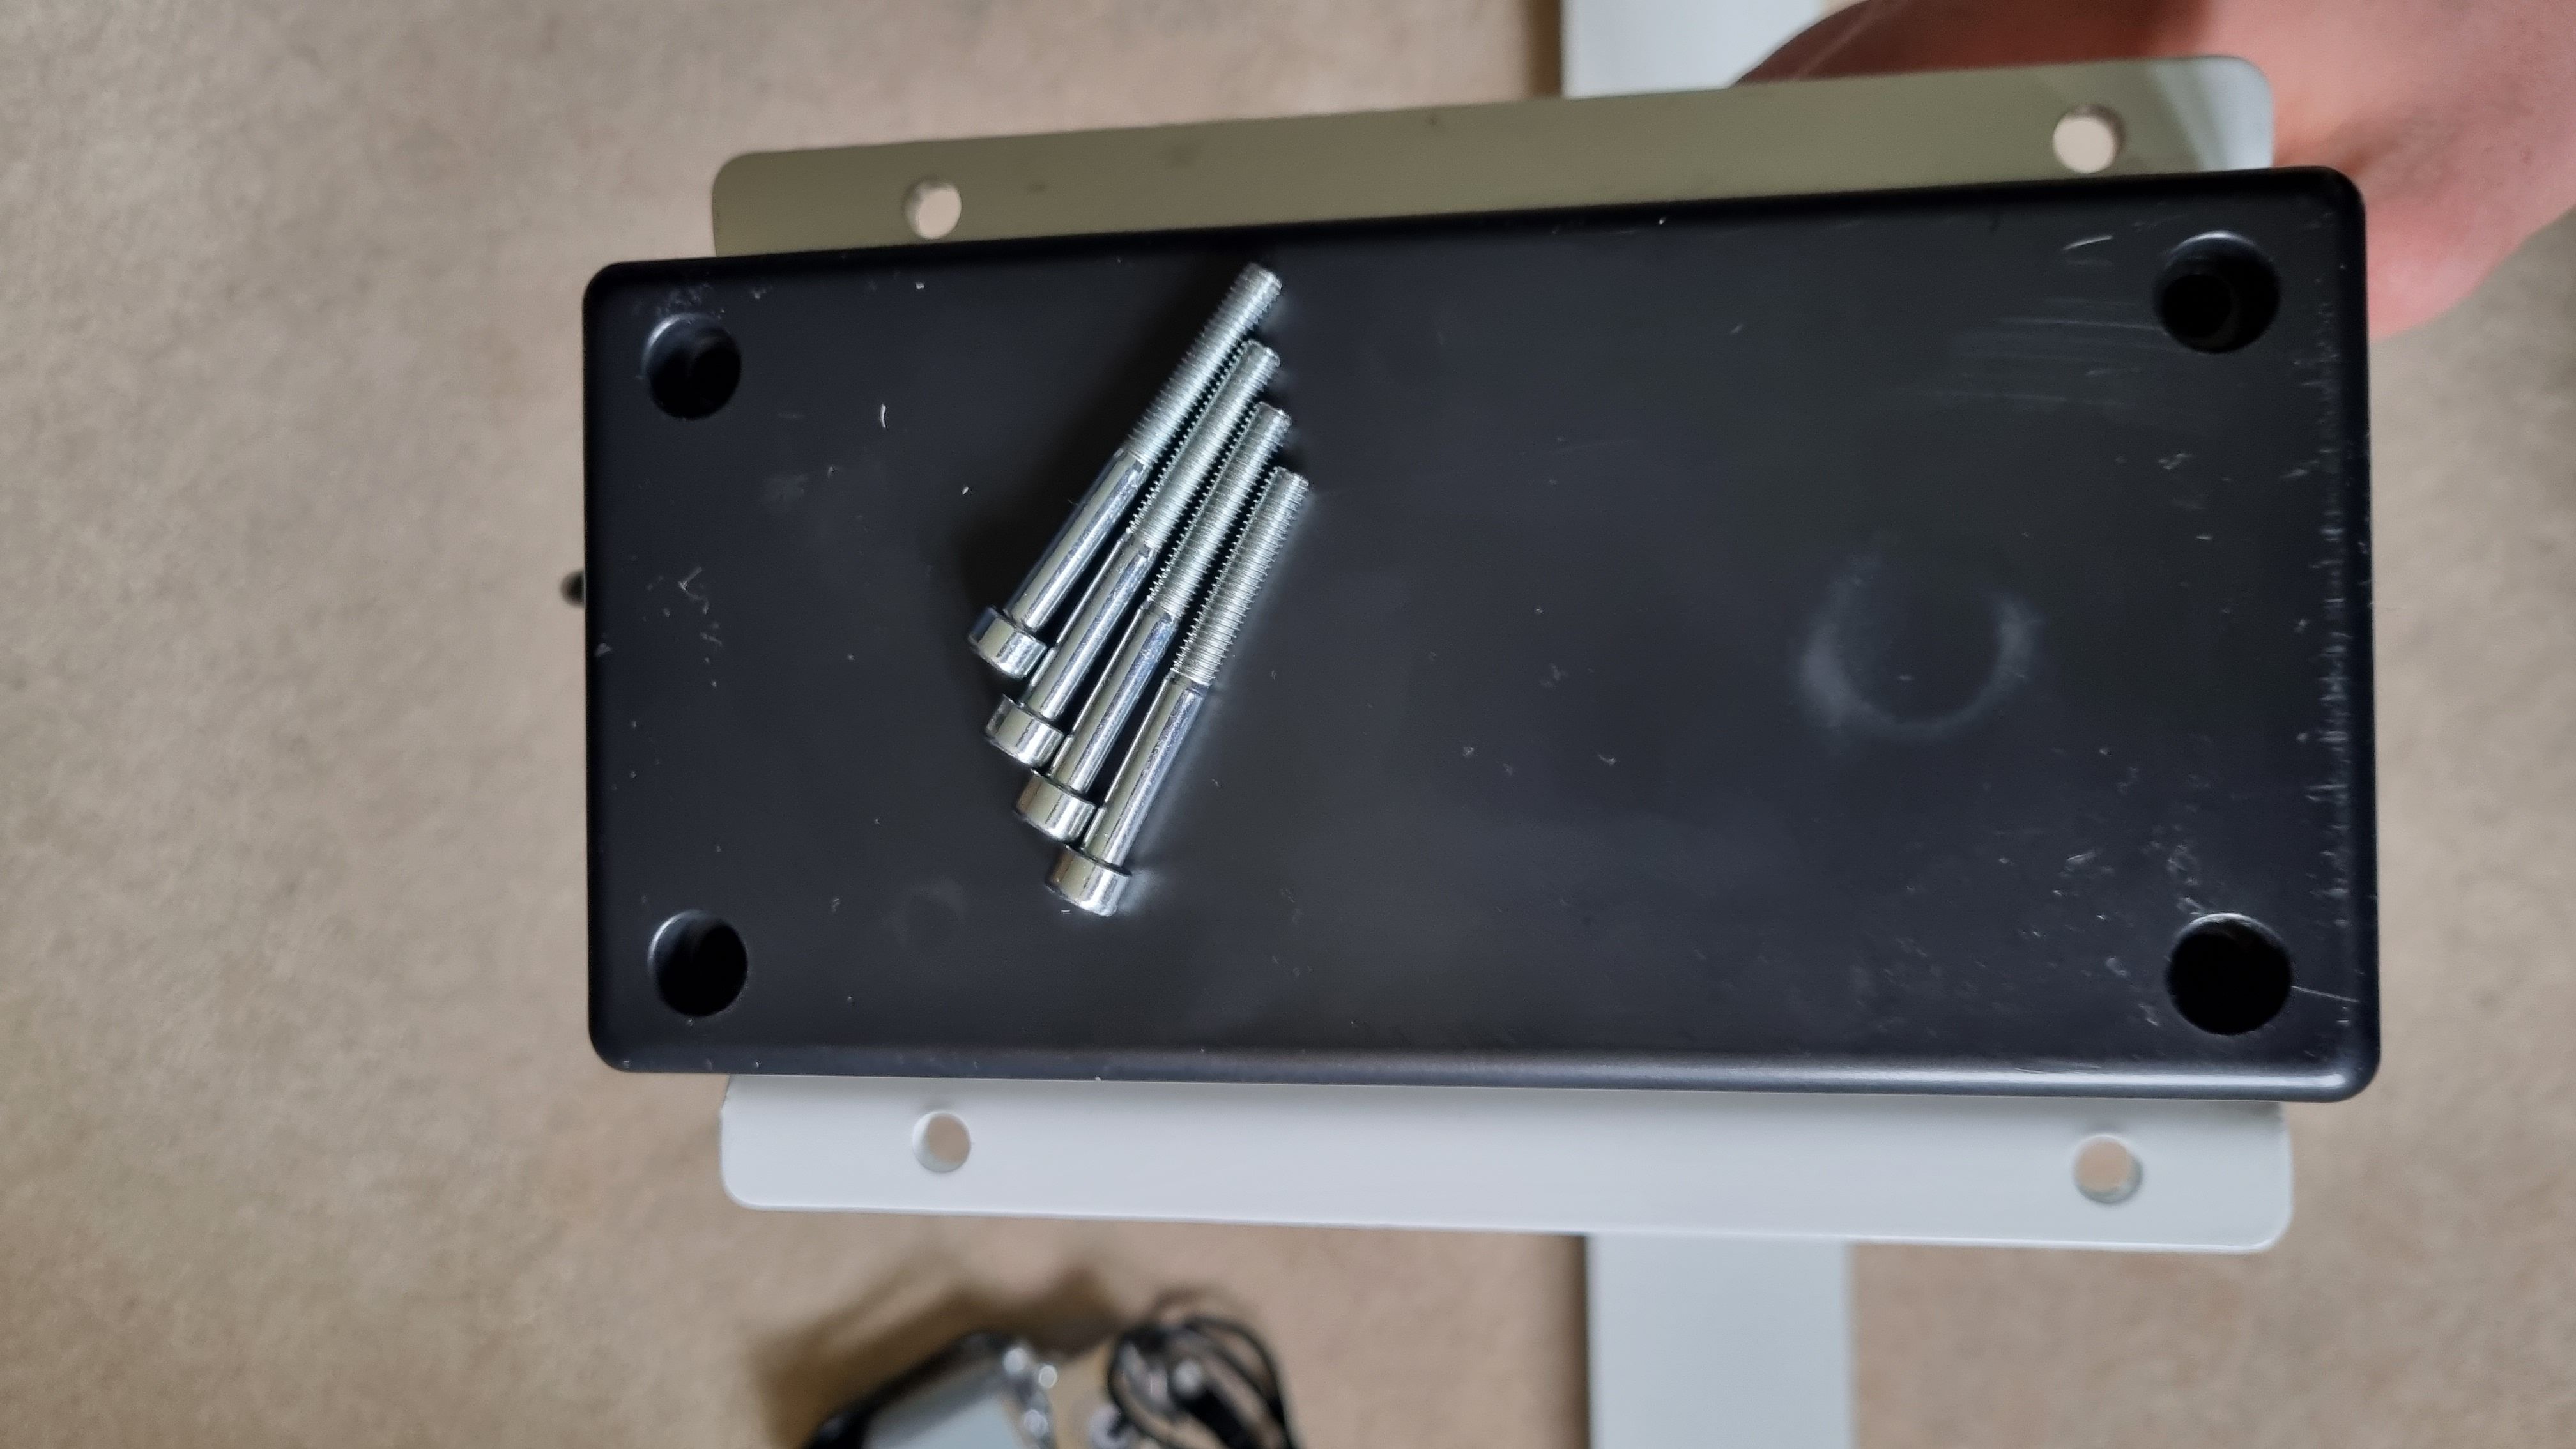
Next, slide off the black case. Note that the case will be wedged into a rubber part on the cable, make sure to remove it from this.
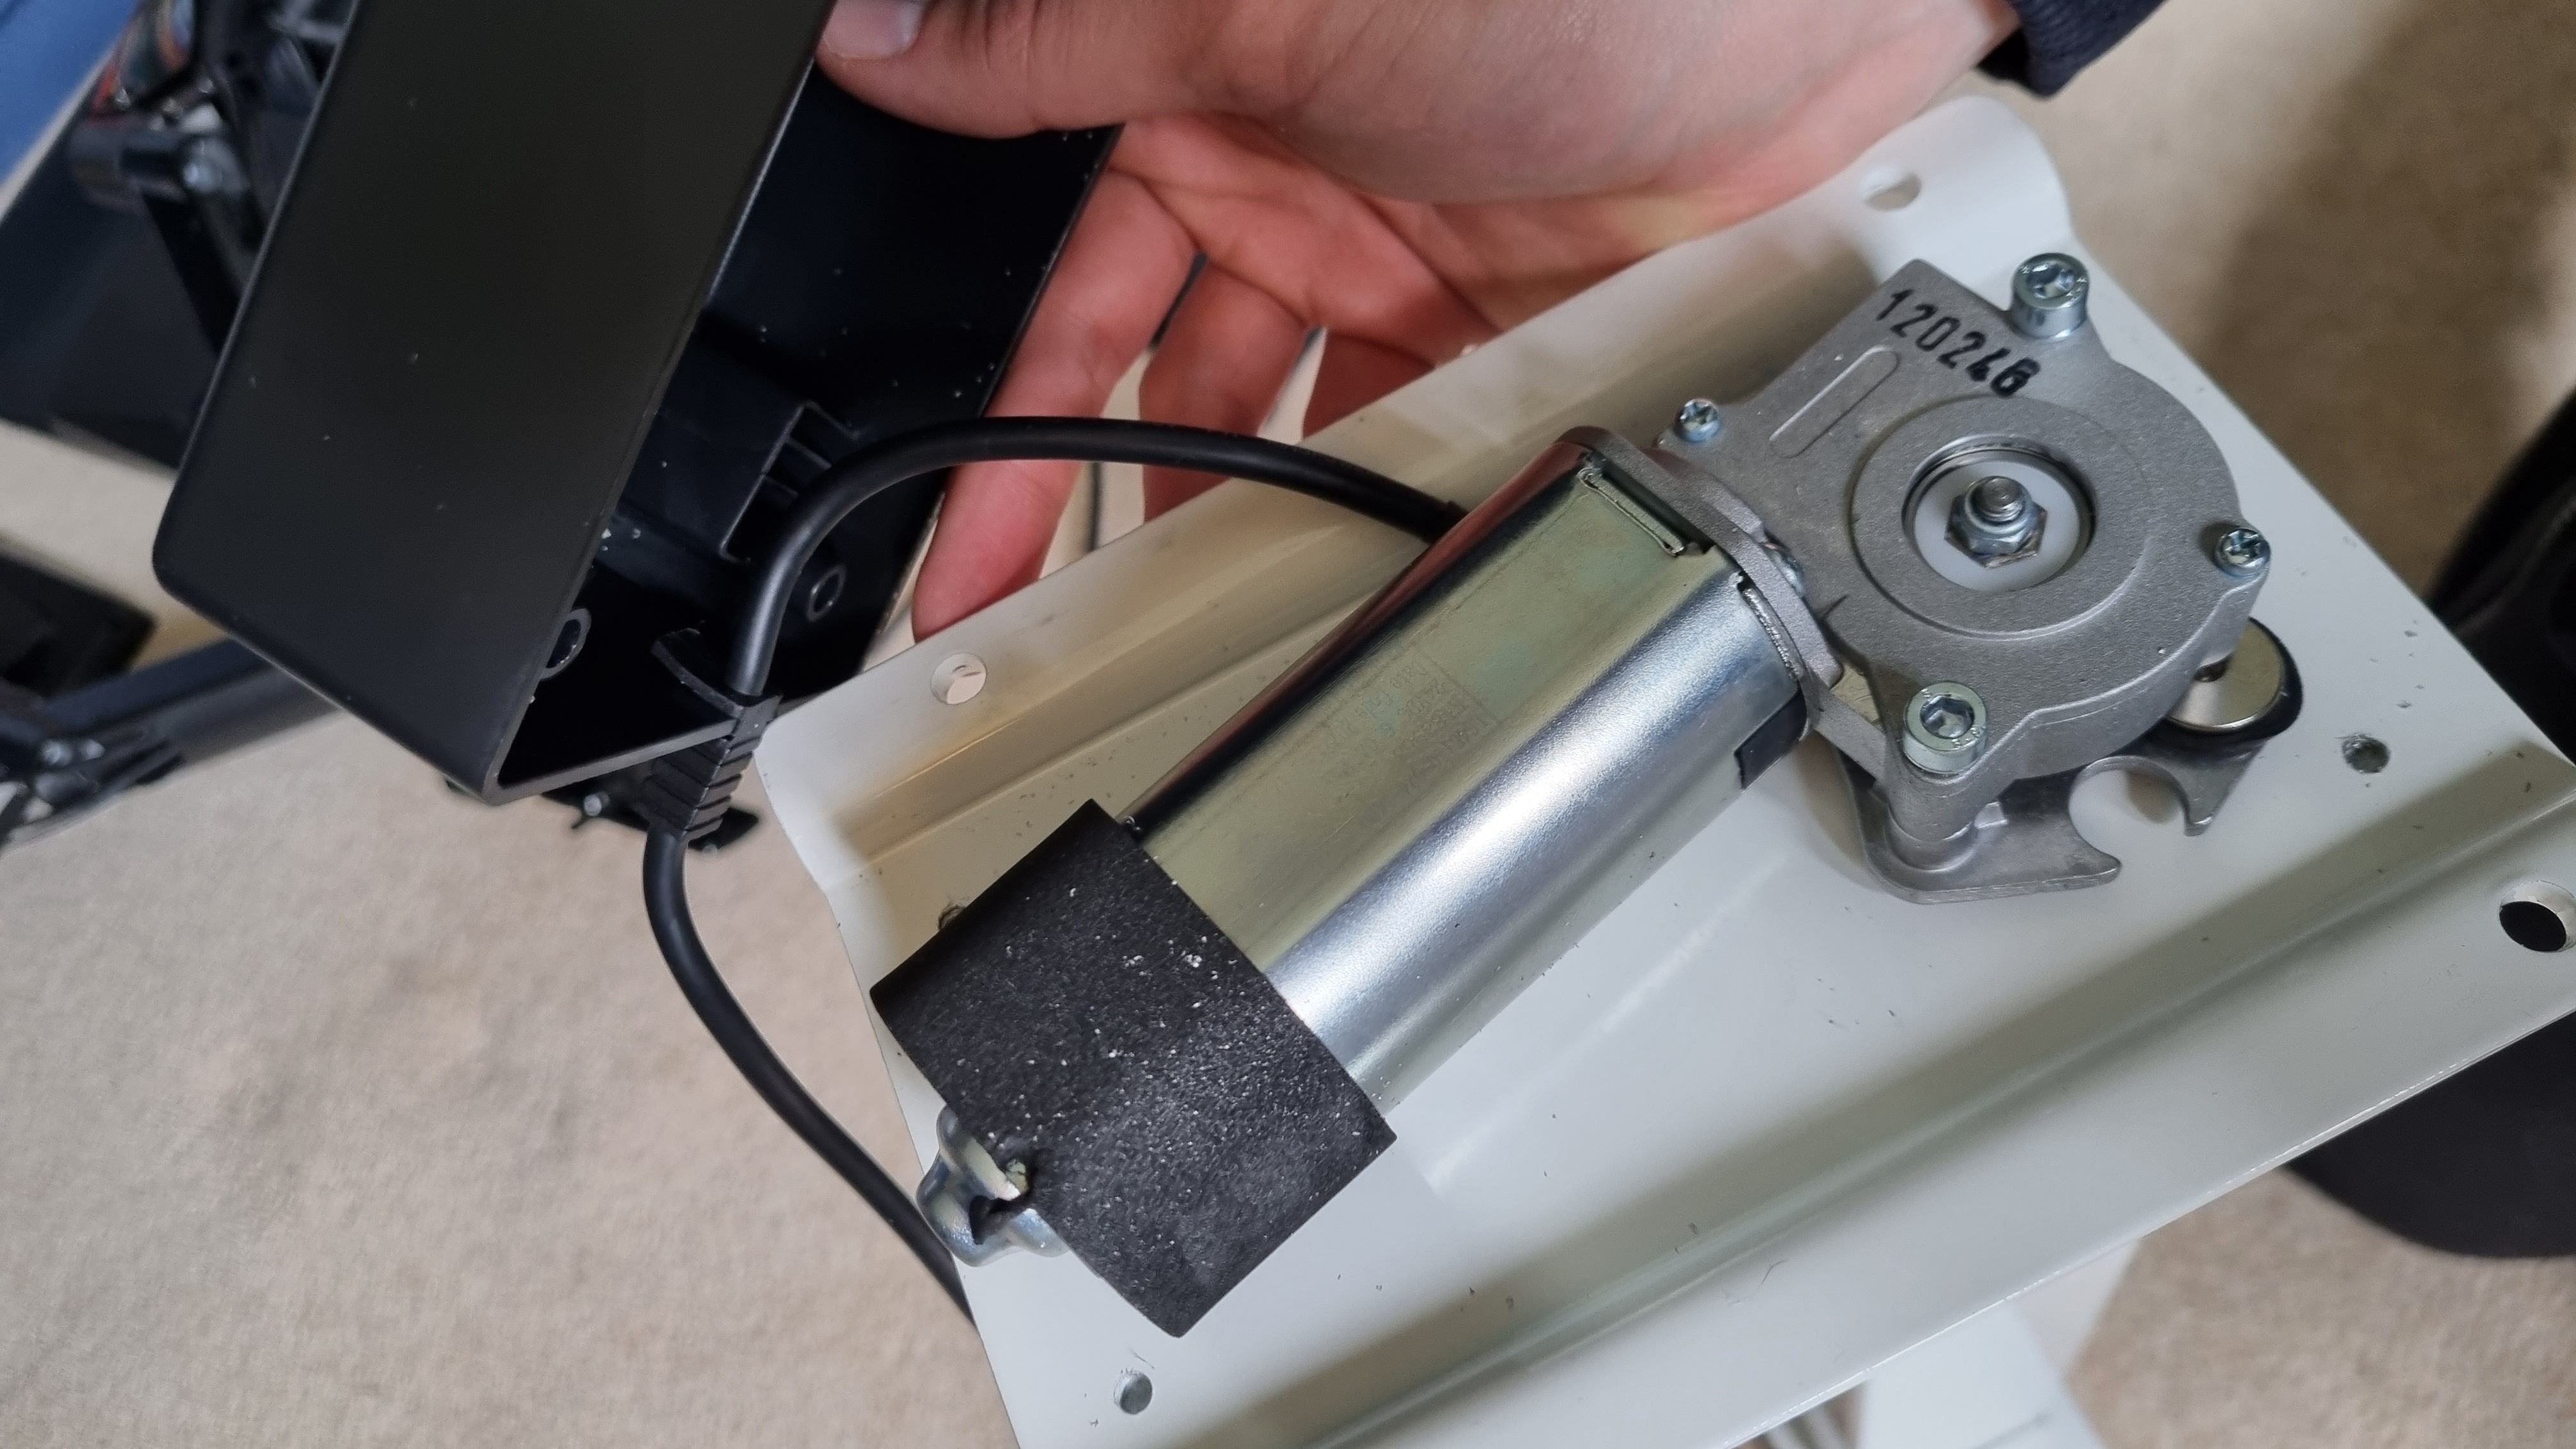
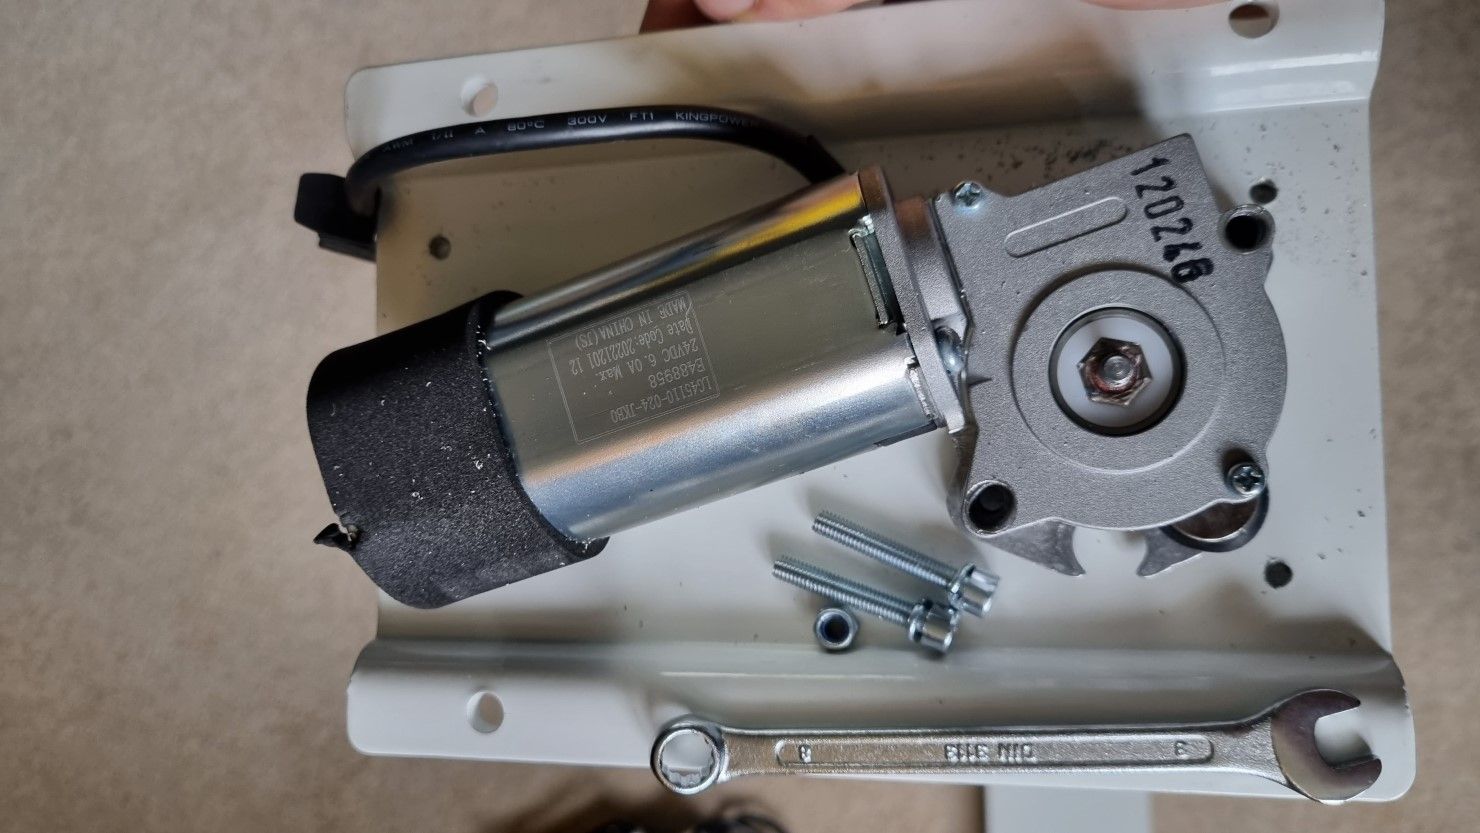
Step 5: Replacing the motor
Unscrew the 2 long screws using the Flexispot tool again. Note that I unscrewed the central nut, but this doesn’t need doing.
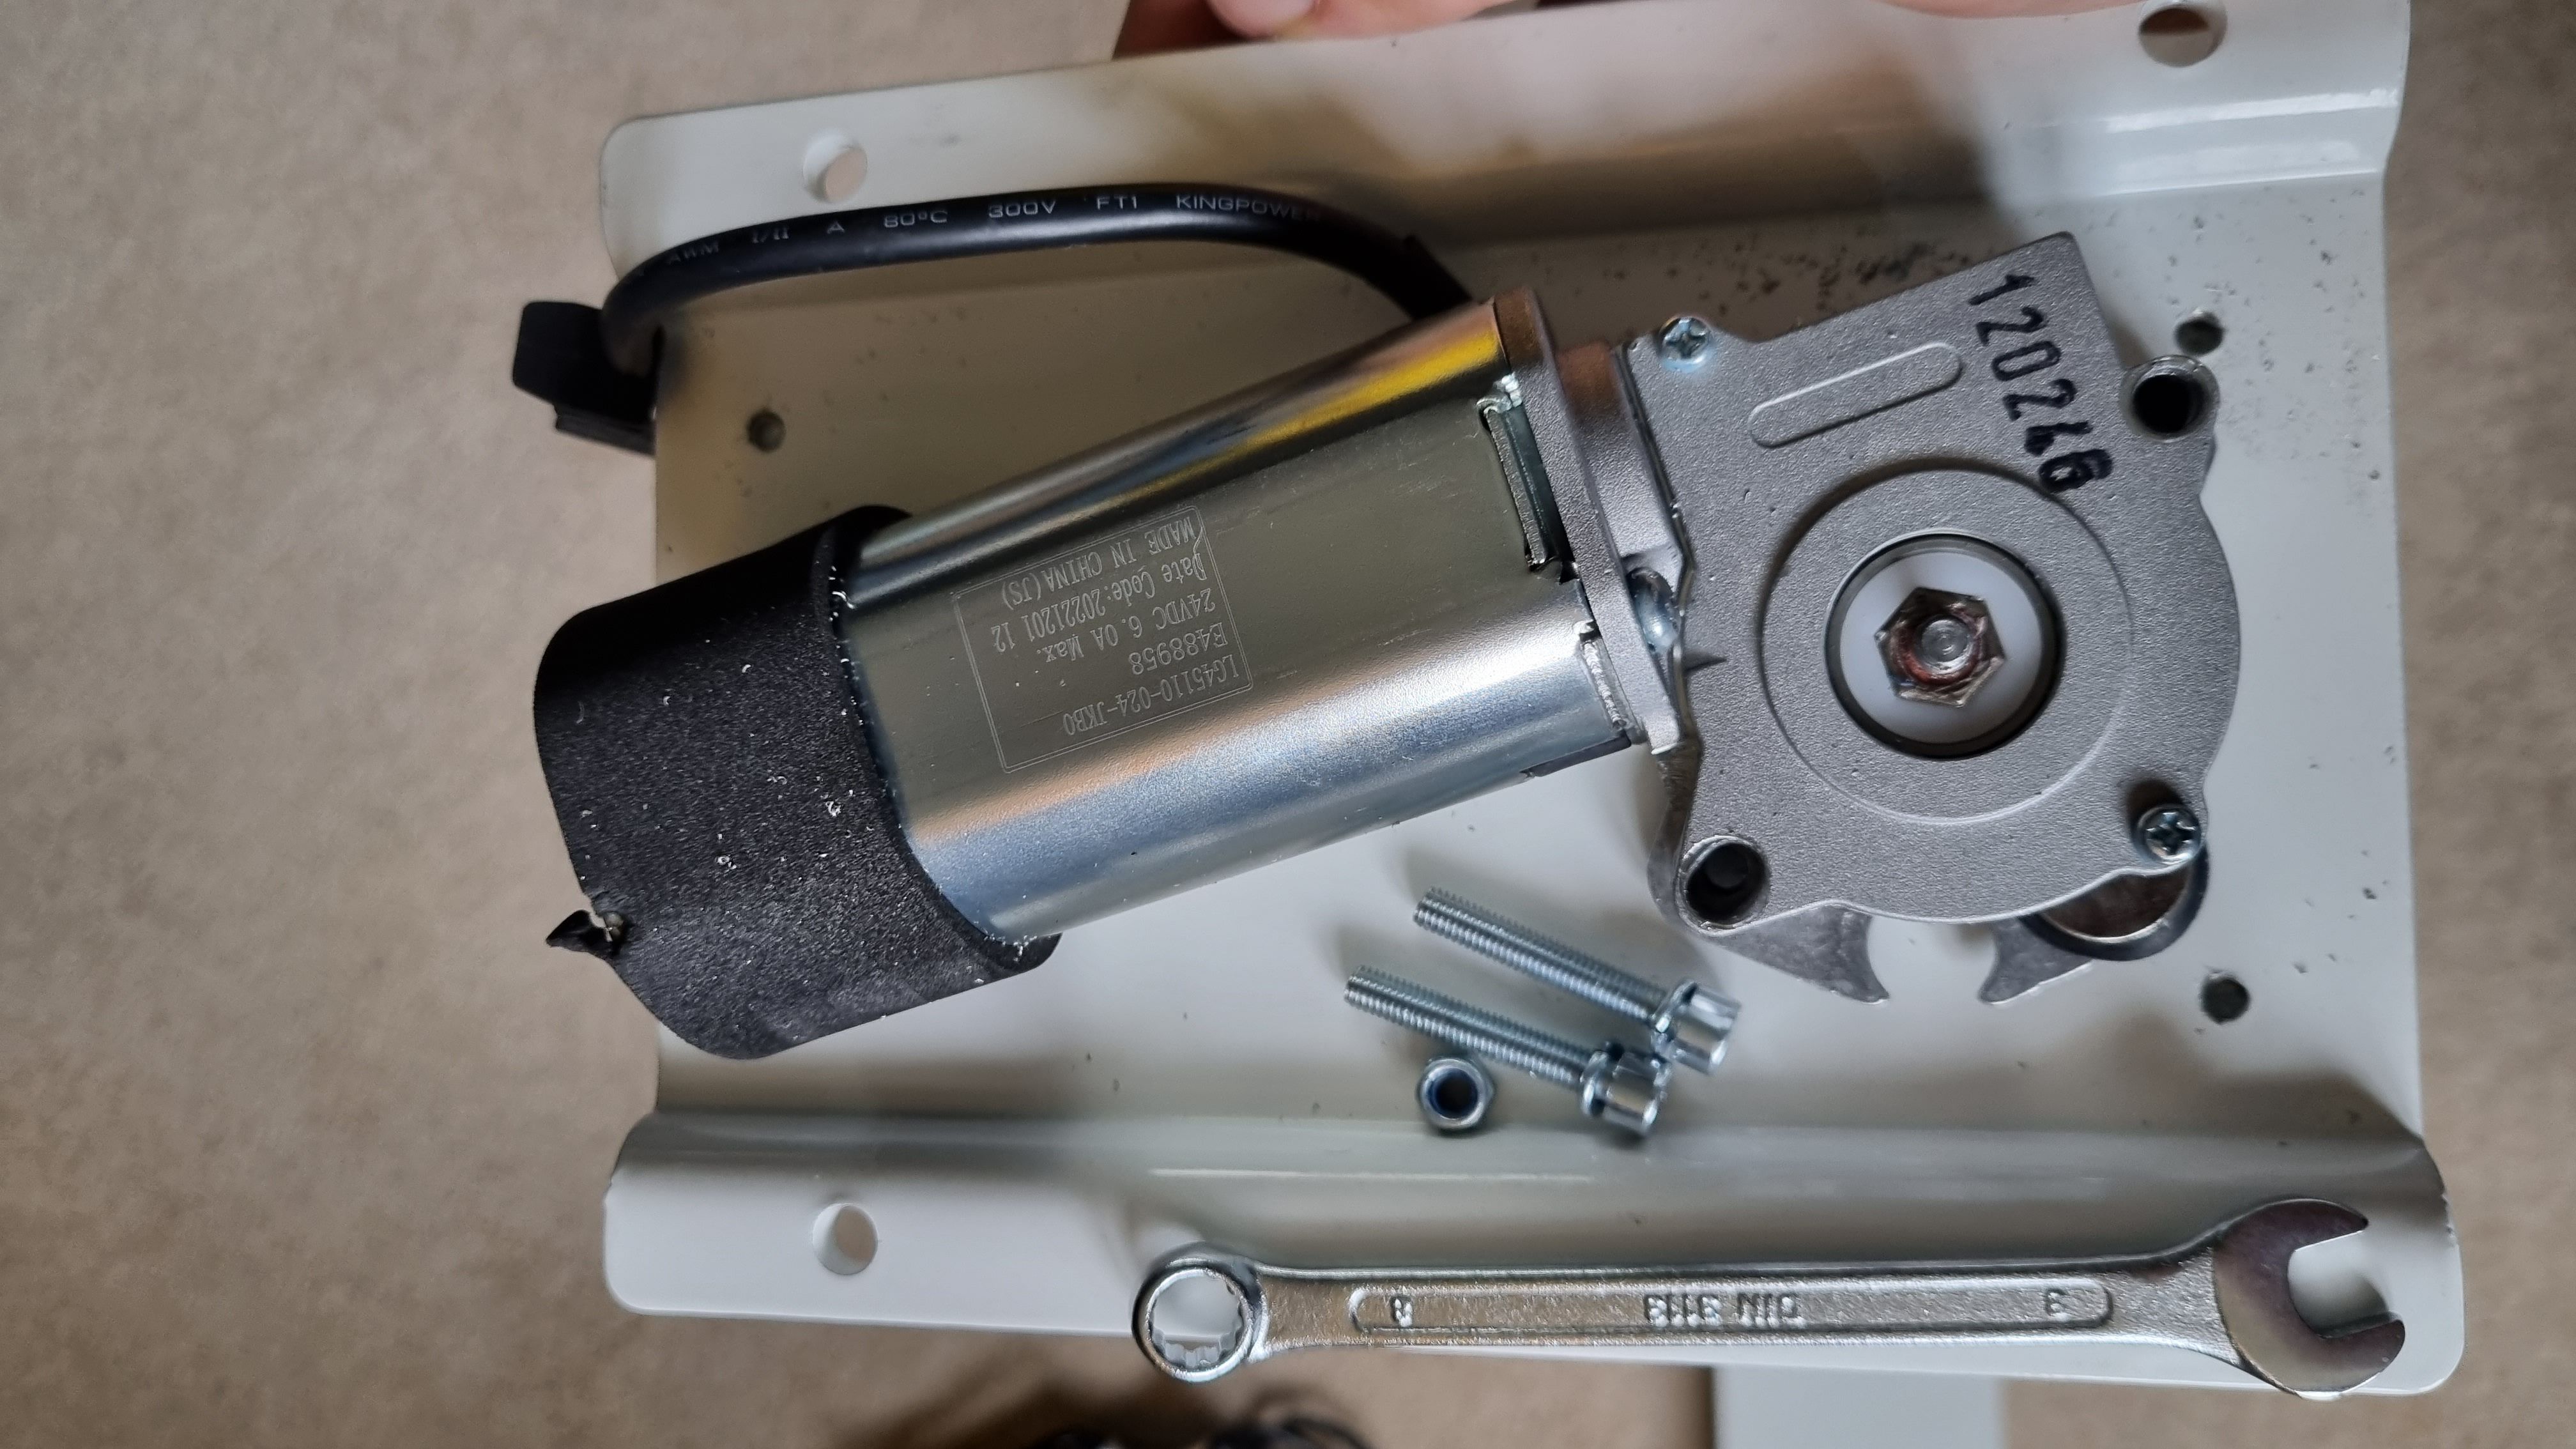
Slide the motor off vertically, and put the new one in. Then replace all of the screws, making sure the central nut is the correct way up if you removed it (rounded bit facing away from the motor).
Step 6: Reinstalling the leg
Simply repeat steps 1-4 in reverse! When screwing the leg back in, I recommend doing the diagonal screws first, to avoid alignment issues.
Your Flexispot desk now has a new motor, hopefully it fixes any issues!